
Now that we know how to proceed deep learning with DeepSeek, we can give it a more user-friendly UI by using Open WebUI.
You will learn how to deploy DeepSeek as well as Open WebUI via RunC.AI.
There will be screenshots along with the instruction, so there is no need to worry! Now let’s get started.
Part A Deploying DeepSeek
First of all, you need to login to your RunC.AI account through this link RunC.AI | Run clever cloud computing for AI. Then you will see a control panel on the screen.
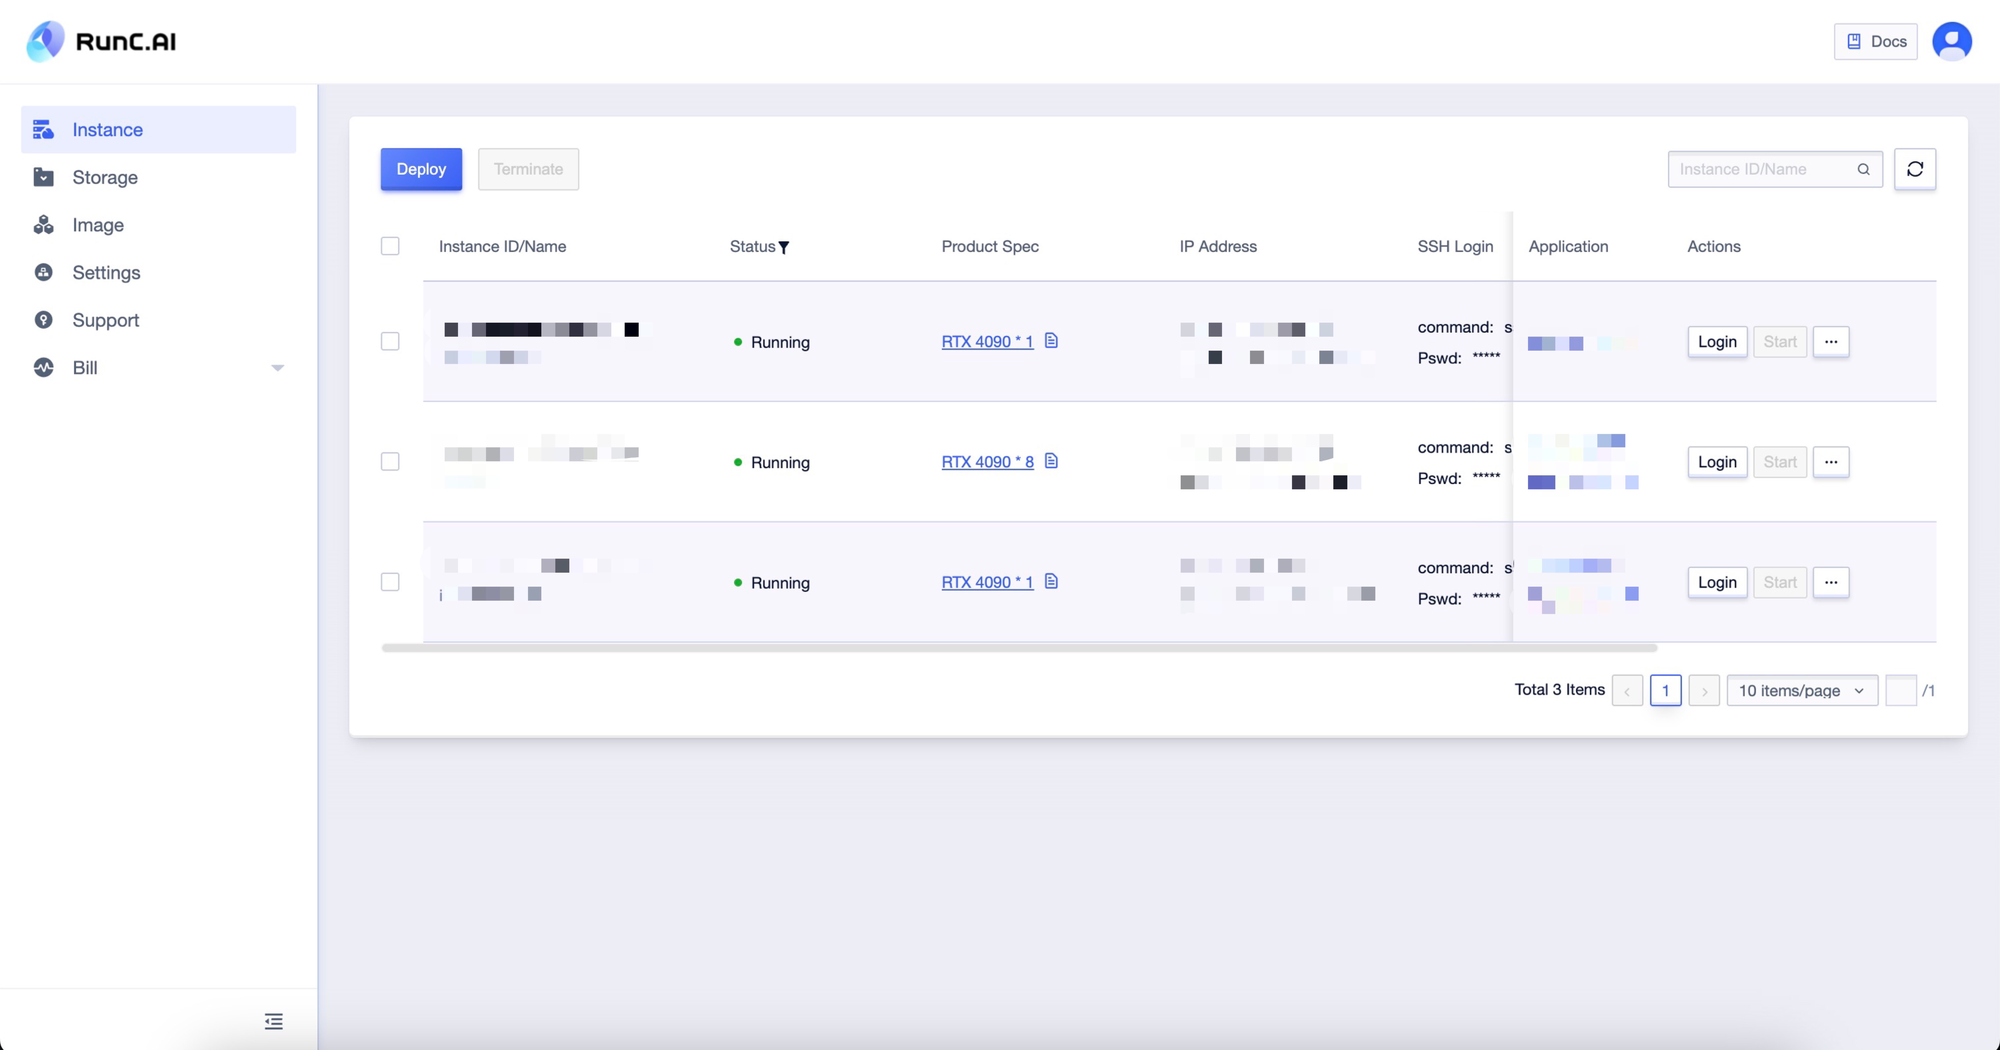
You will then click the Deploy button to deploy a new instance.
Then you need to scroll down to “Image”, and choose “Container Image”. We will select “DeepSeek” for this tutorial. You can change the name of your instance below.
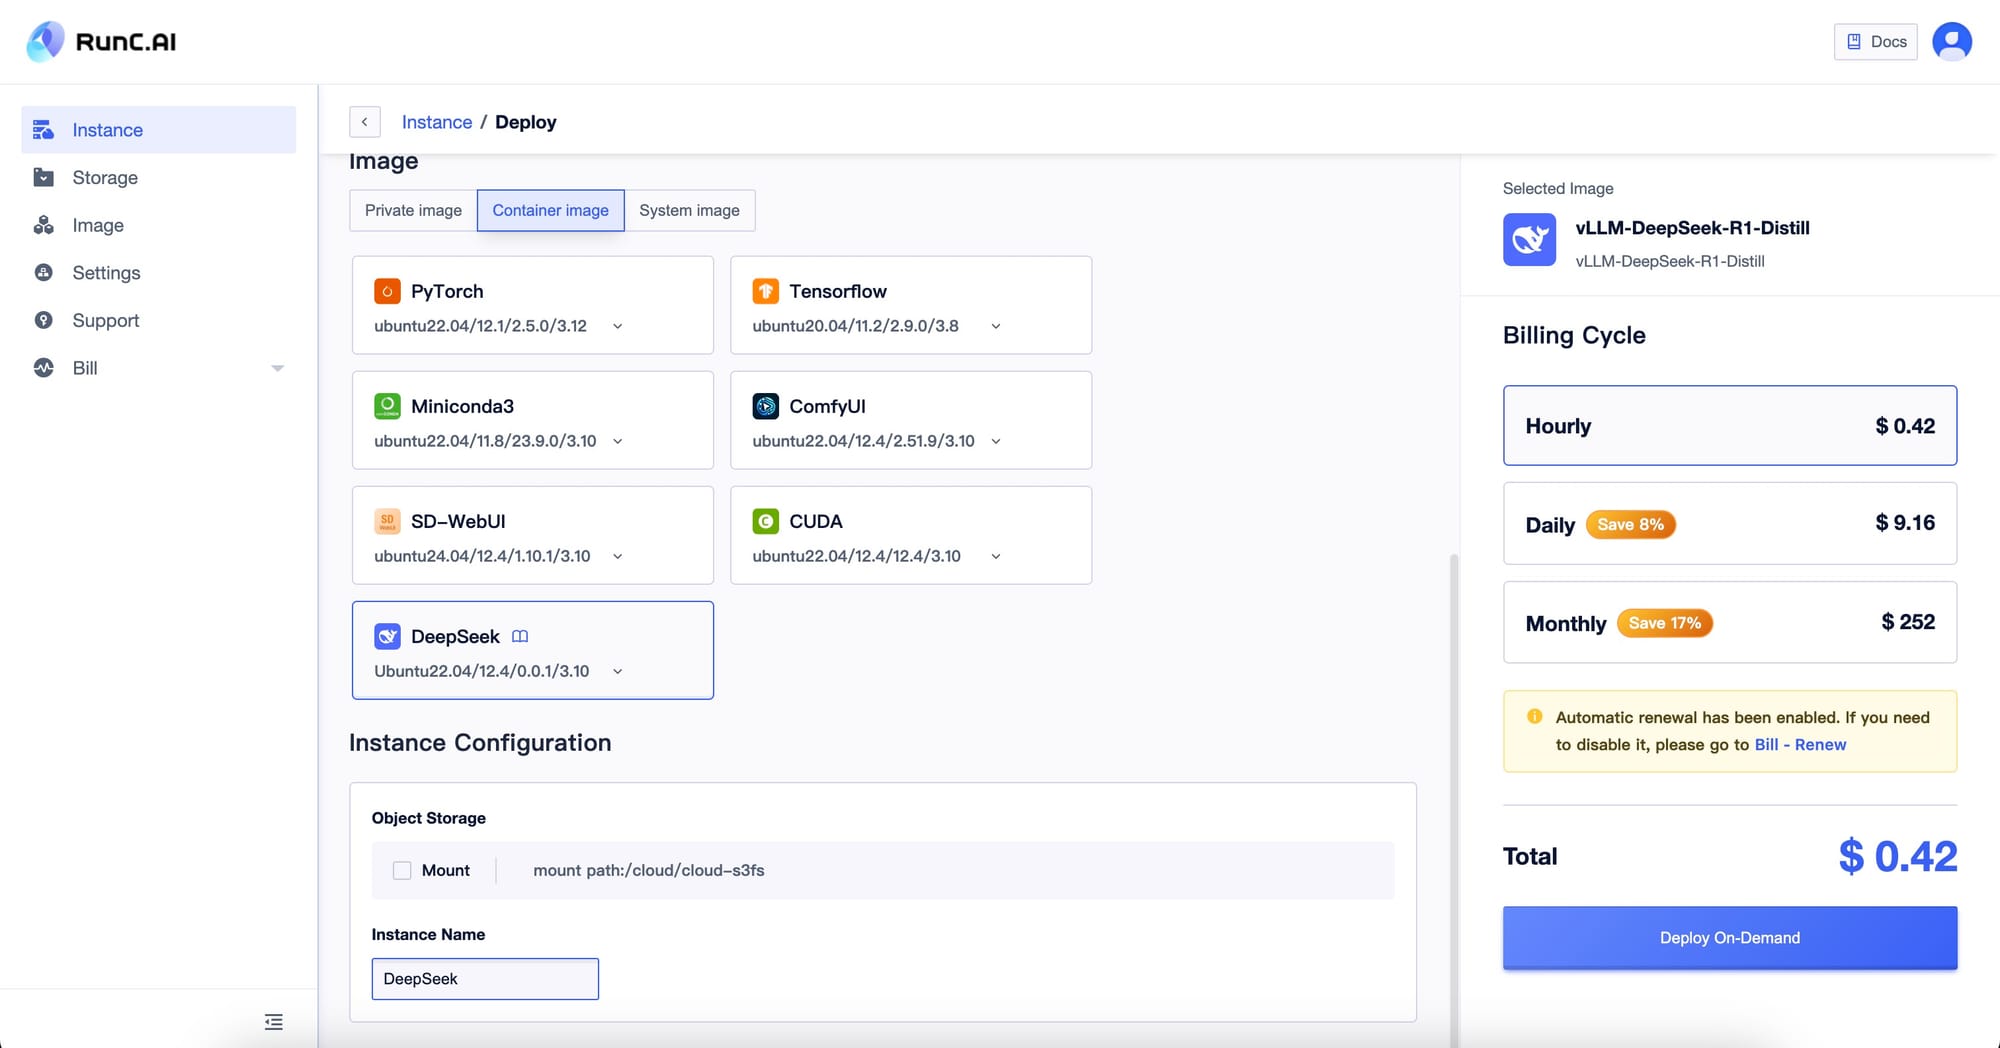
After that you can click on the Deploy On-Demand button to deploy.
You will then see a panel that looks like the following

Note that the status of your instance is “Initialize”. This is normal after you just deployed the instance, you will need to wait a couple of minutes and wait for the status to change to “Running”. If the status remains "Initialize" for five minutes, you can send a ticket to us.
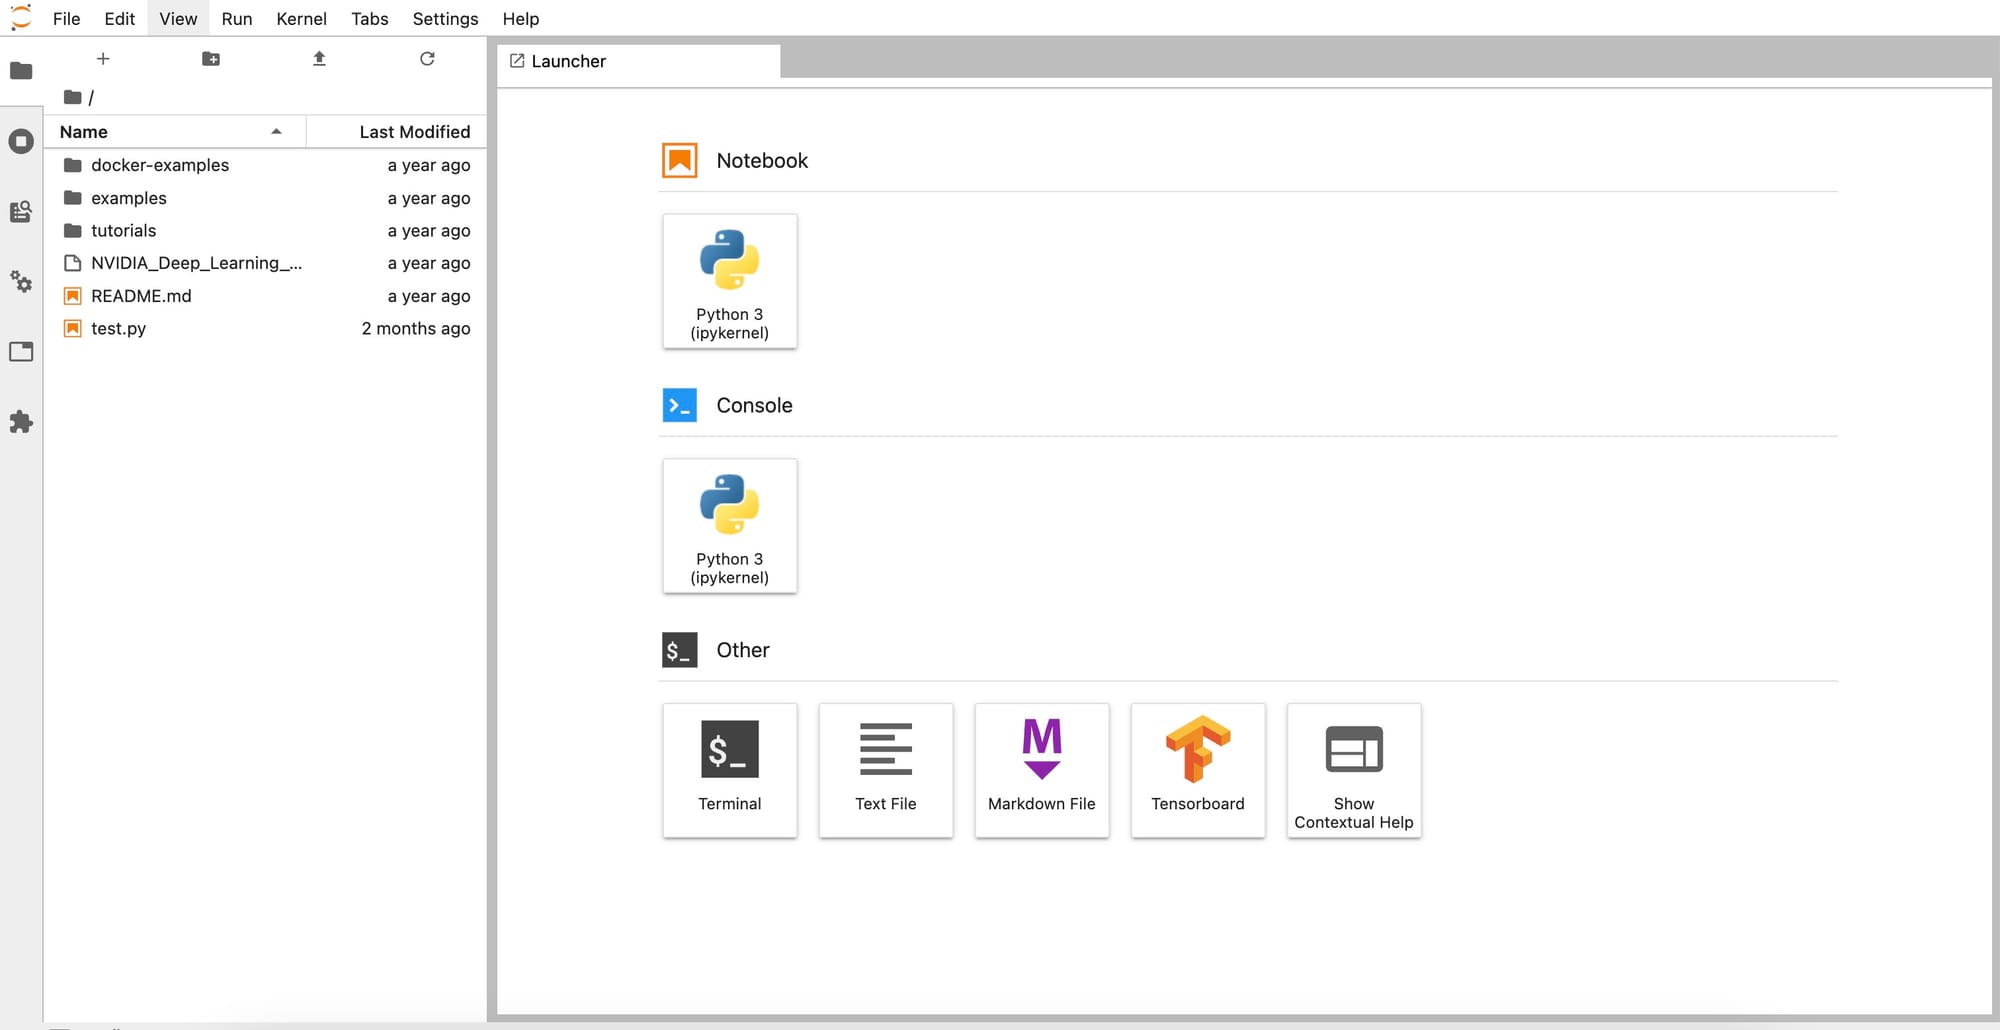
Then you will need to click the "JupyterLab" button

The JupyterLab should look like this
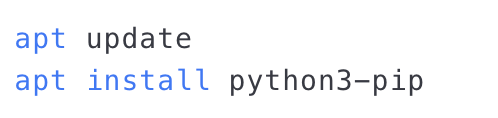
Click the Terminal button to open a terminal. Once the terminal is opened, type in the following commands.

The program is all set up when you see the following on the screen
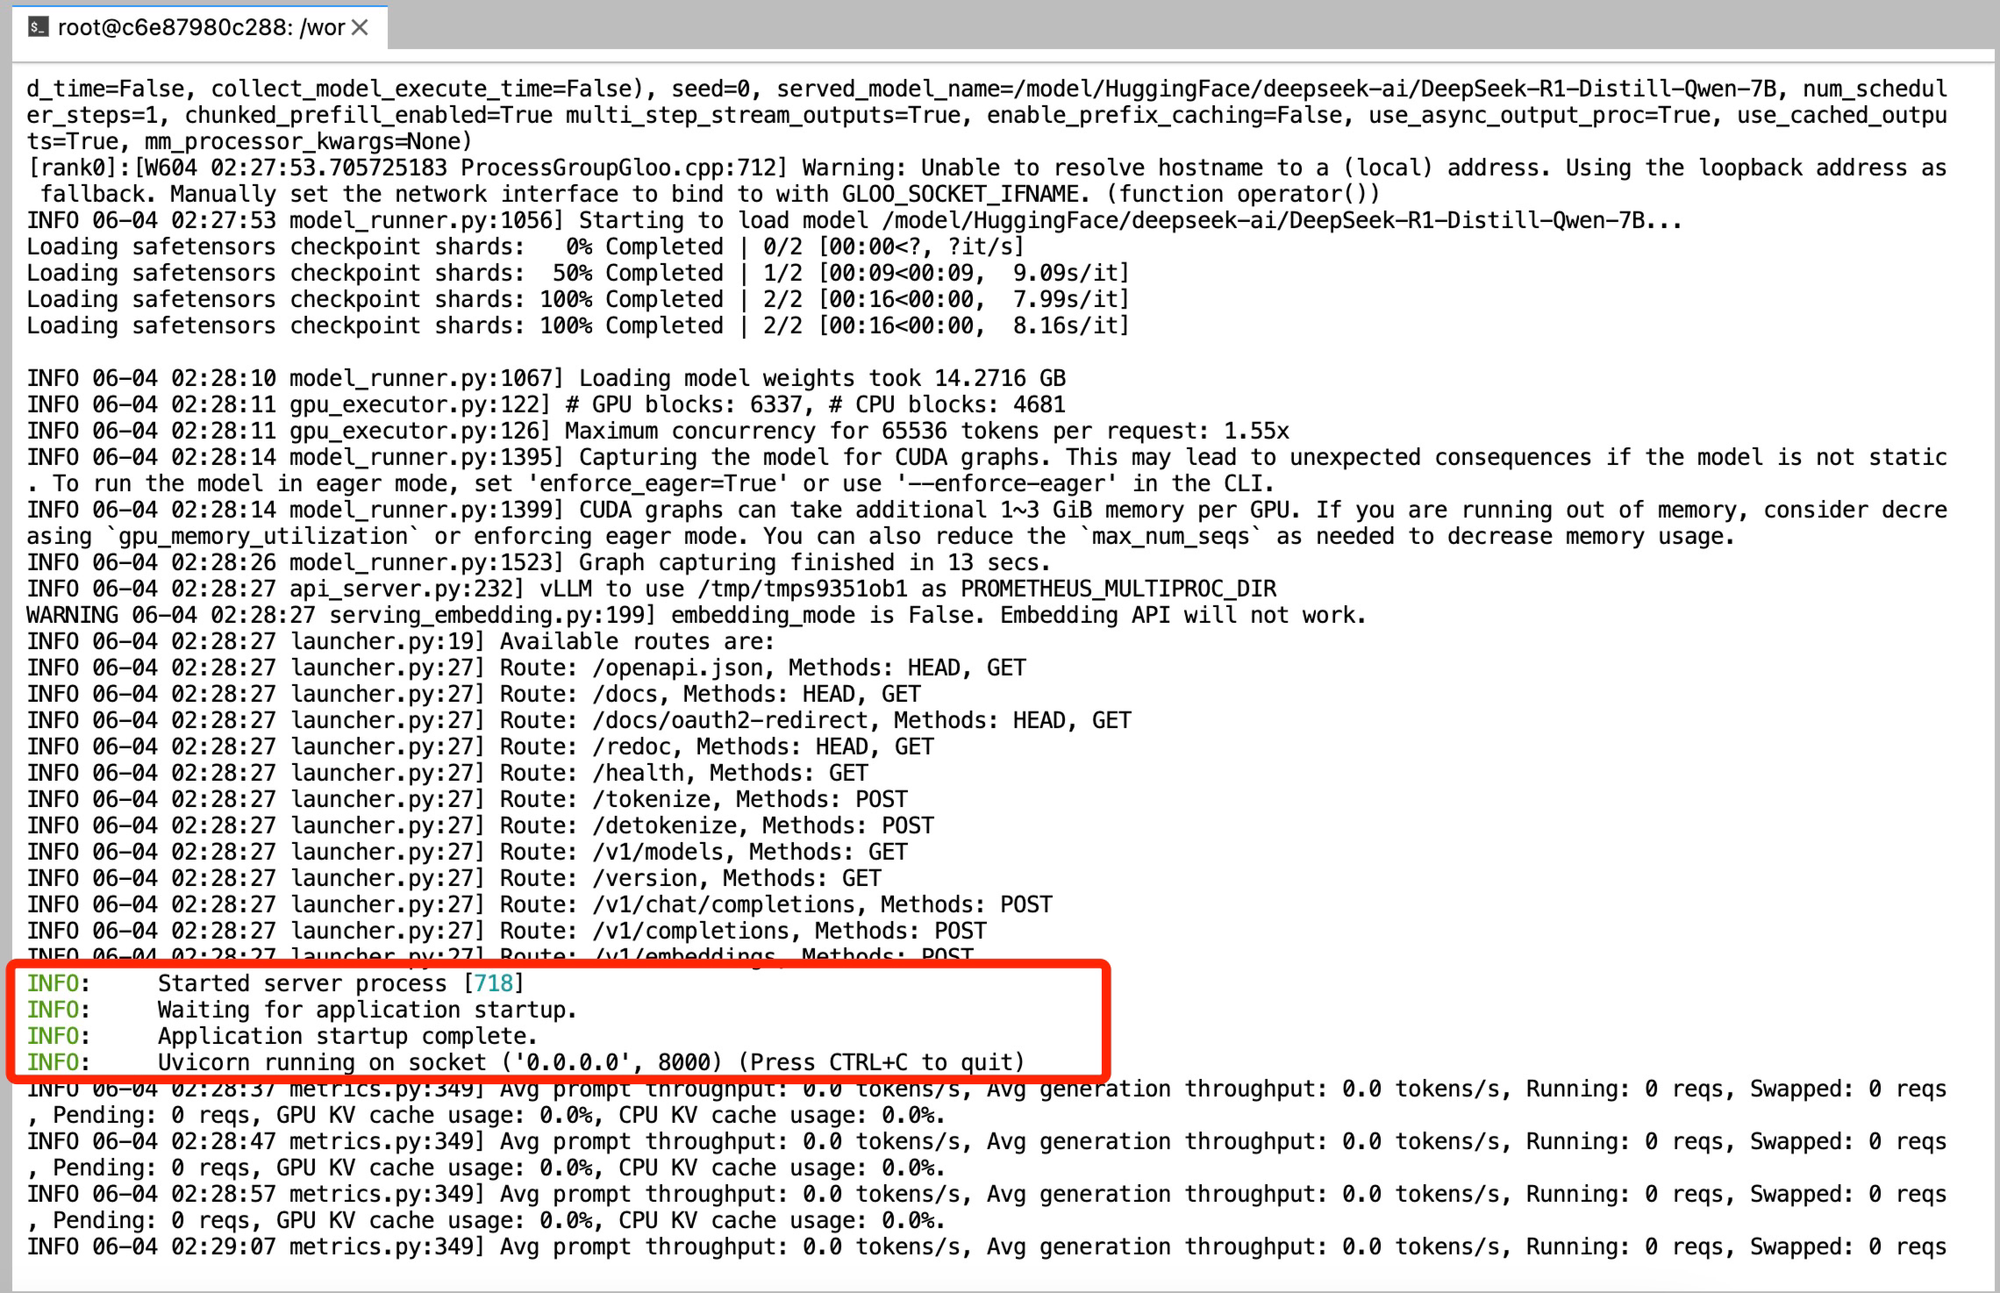
Then, open another terminal by clicking the addition sign “+” on the top left corner. This time, run the following command.

Then the following should appear on your screen
This means DeepSeek is already deployed and ready to be used.
Go to <IP address>:8000/docs where the <IP address> is the address of your instance which can be found in the following place

Once you get in <IP address>:8000/docs, you will see the following API interfaces on your screen.
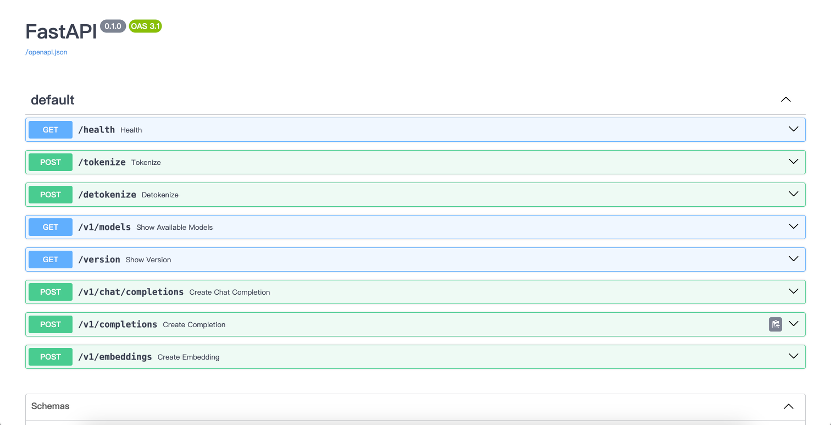
You will need the /v1 in a bit, so do not close this page.
We will be giving it a user interface in the following steps.
Part B Updating Python
First, type in the command python –version to check the version of your Python. If it is lower than 3.11, you will need to update it to 3.11. To update Python, you should follow the following steps carefully.
You will need to type in the following commands

Then you need to type in the following command to set python 3.11 to be the running version

Note: the “sudo” here should be discarded.
Then you are set for Python. The next to do is to install open-webui. First you will need to install “pip”. To install pip, you need to type in the following command.
Part C Installing Open-webui
Install open-webui.

After installing open-webui, type in the following to set port to 11111.

Now with just a couple more steps, everything will be ready.
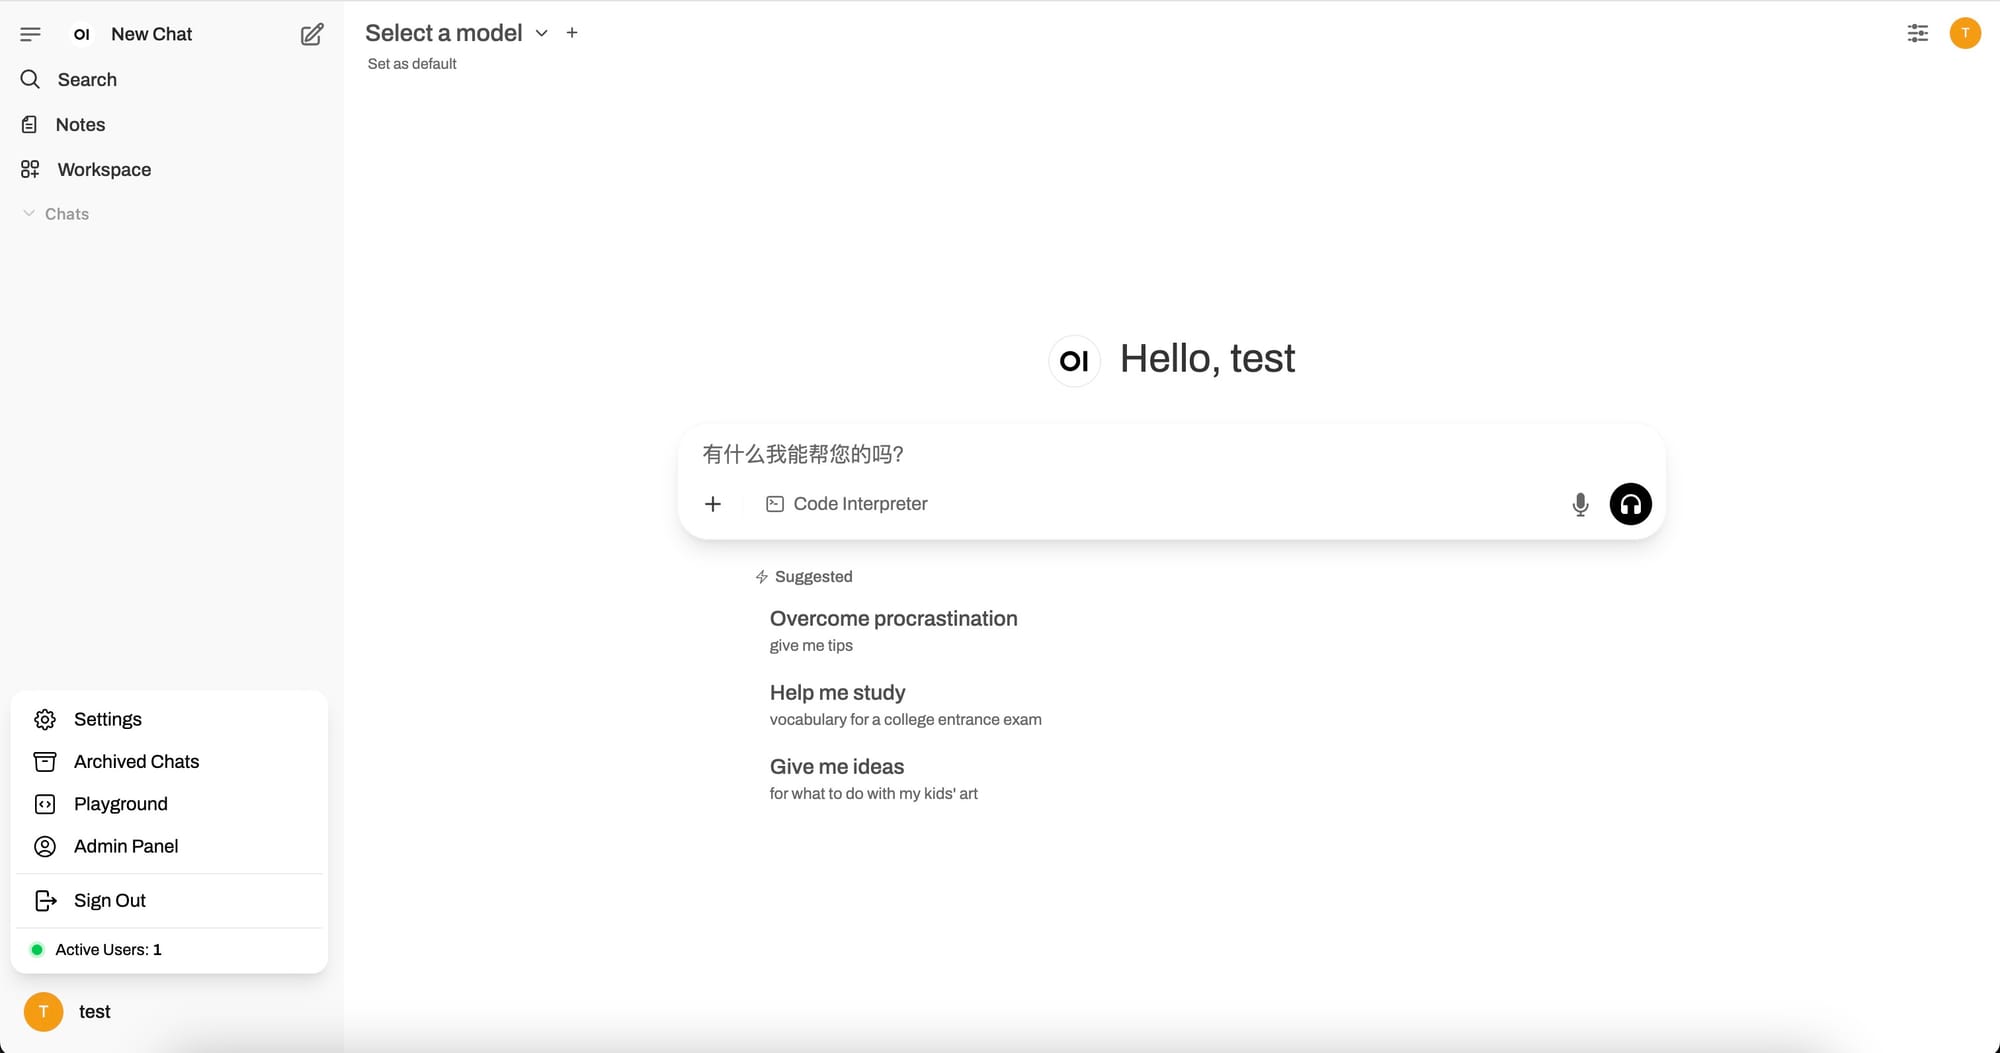
You can visit your website by visiting the following address: <IP address>:11111.
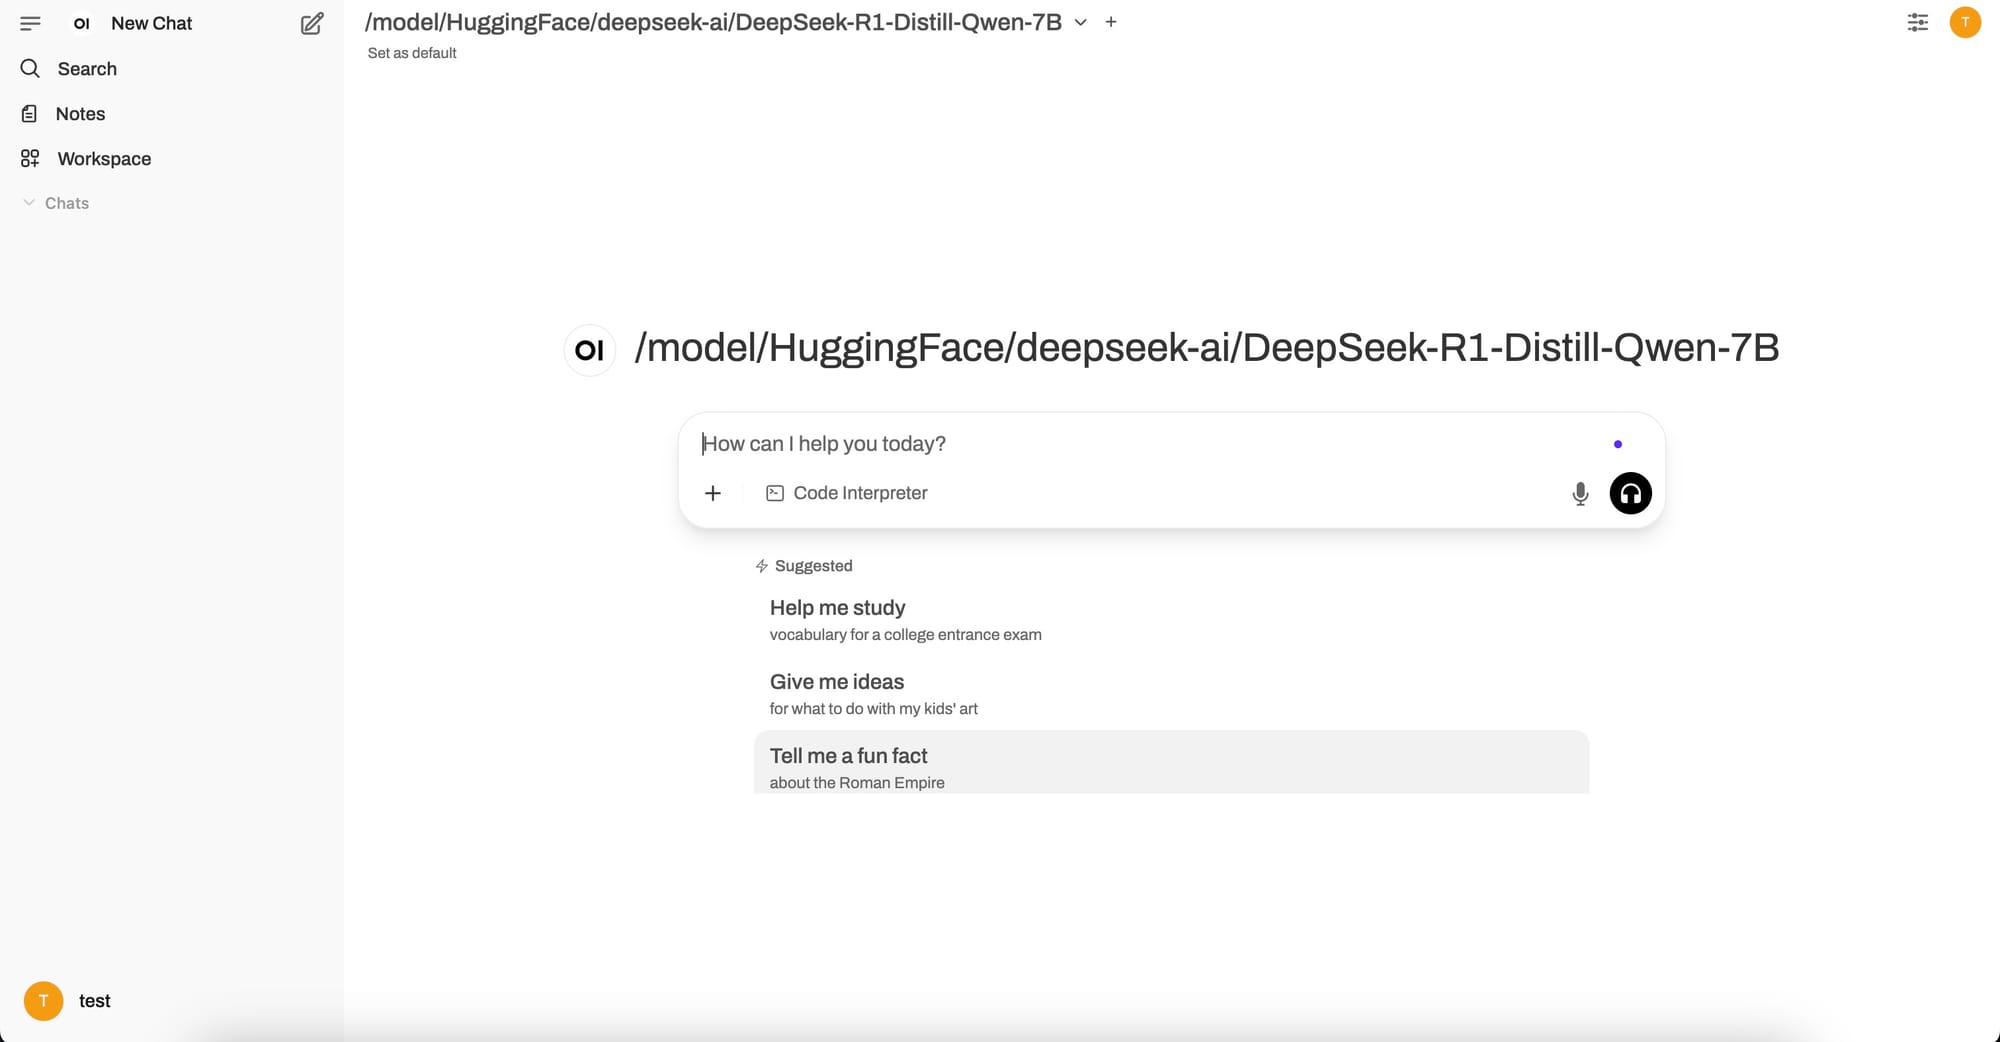
The website will let you login, and after you login you will come to this page
Now click the profile on the bottom left corner and select settings. In settings, select connections and you will see the following.
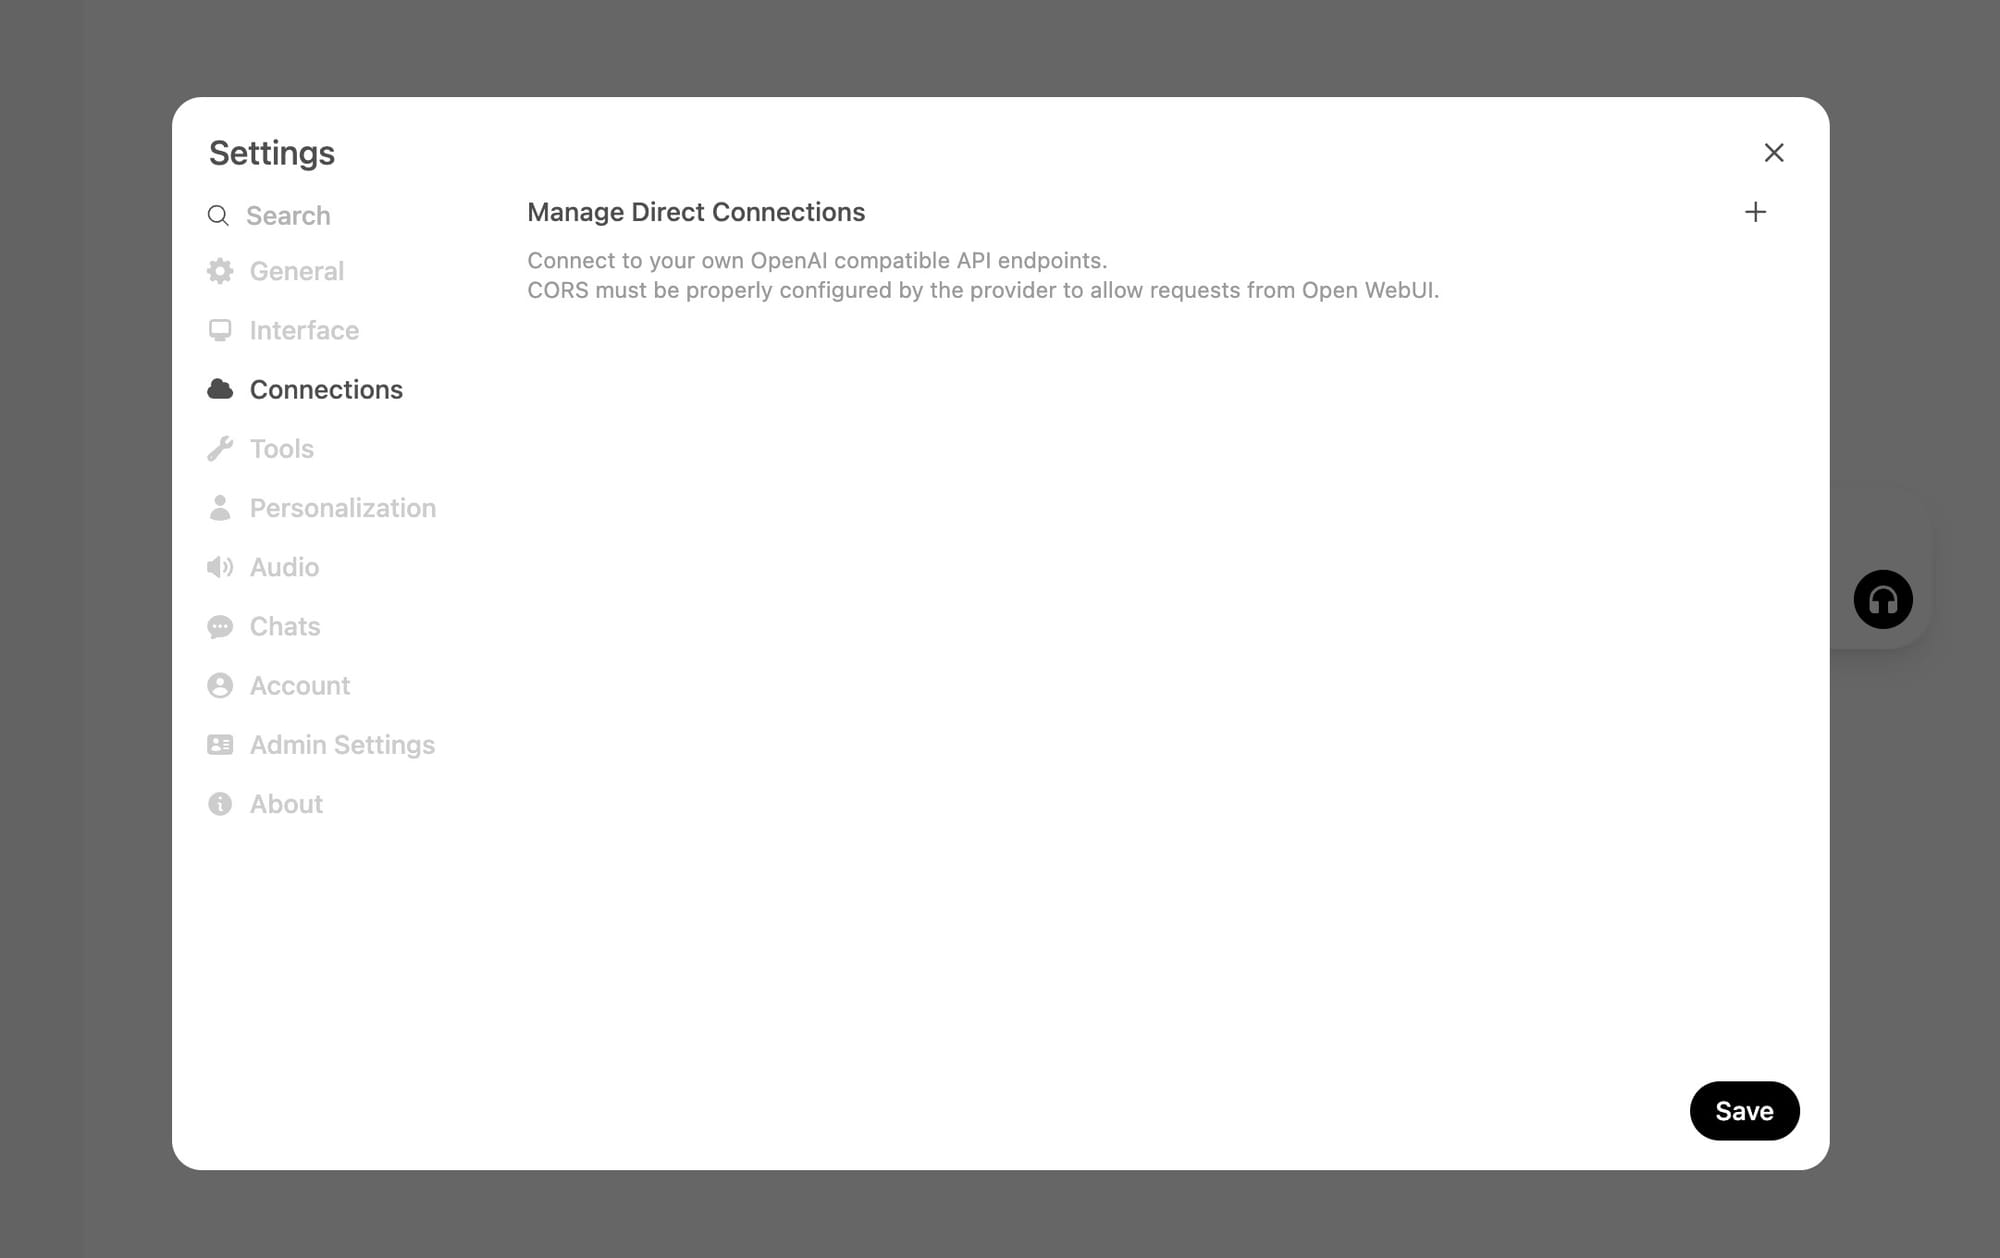
Now add a connection
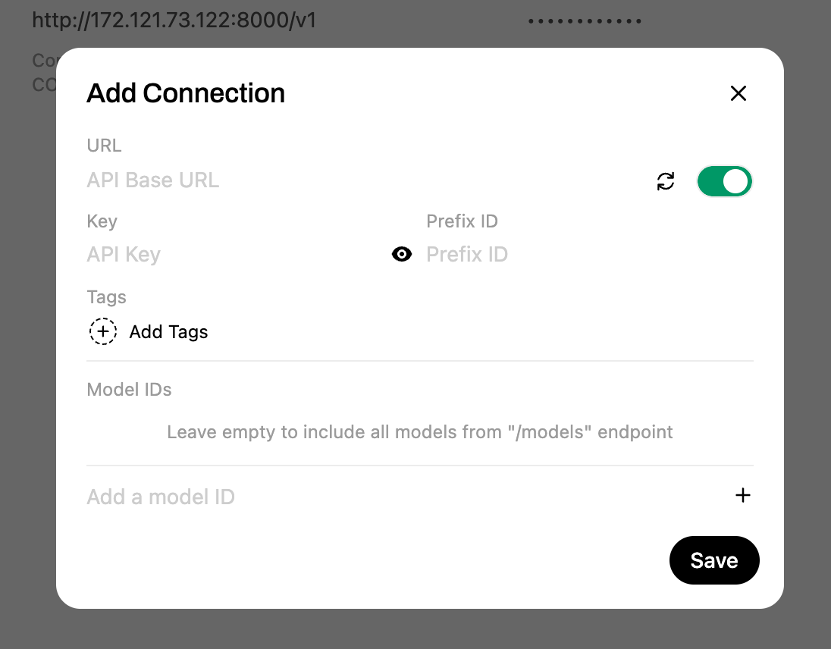
The URL part is <IP address>:8000/v1
To look for the API key, you need to go back to JupyterLab.
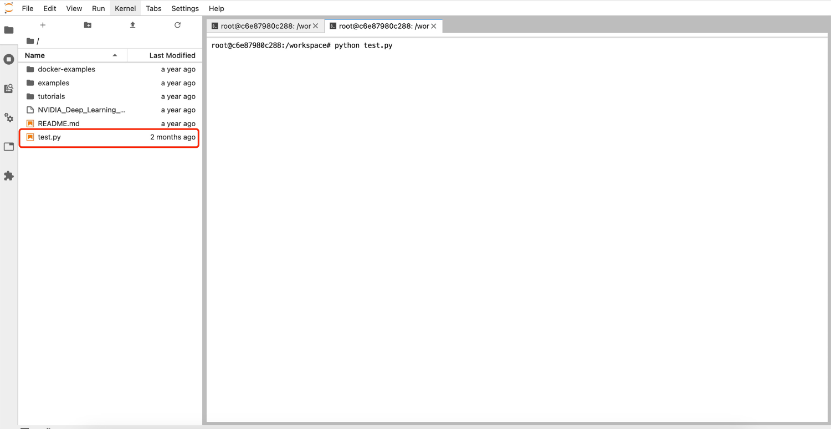
Open this file, and you will find the following code, and API key is the circled code.
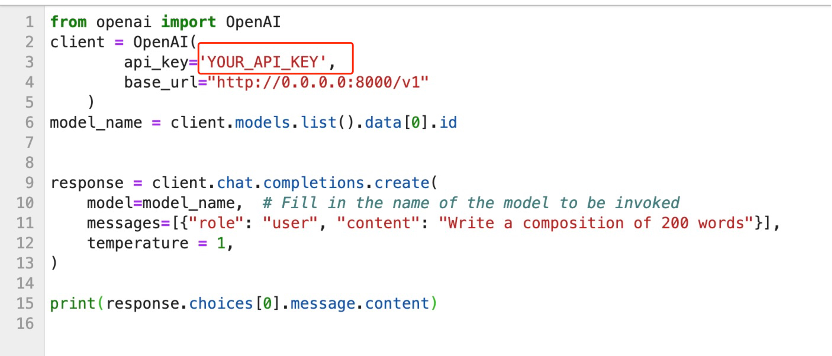
Then click save, and your model is ready!
About RunC.AI
Rent smart, run fast. RunC.AI allows users to gain access to a wide selection of scalable, high-performance GPU instances and clusters at competitive prices compared to major cloud providers like Amazon Web Services (AWS), Google Cloud, and Microsoft Azure.