Welcome to our first deployment tutorial! This tutorial is designed to give you an idea of how to deploy ComfyUI with RunC. The steps are simple, don't worry! I'm sure even a pure novice can handle it! Let's goooo!!
1. Deploy ComfyUI on RunC
First of all, sign in/up RunC.AI | Run clever cloud computing for AI (New customers before 6th, June 2025 get $5 in free credits, about 12h of 4090 usage time)
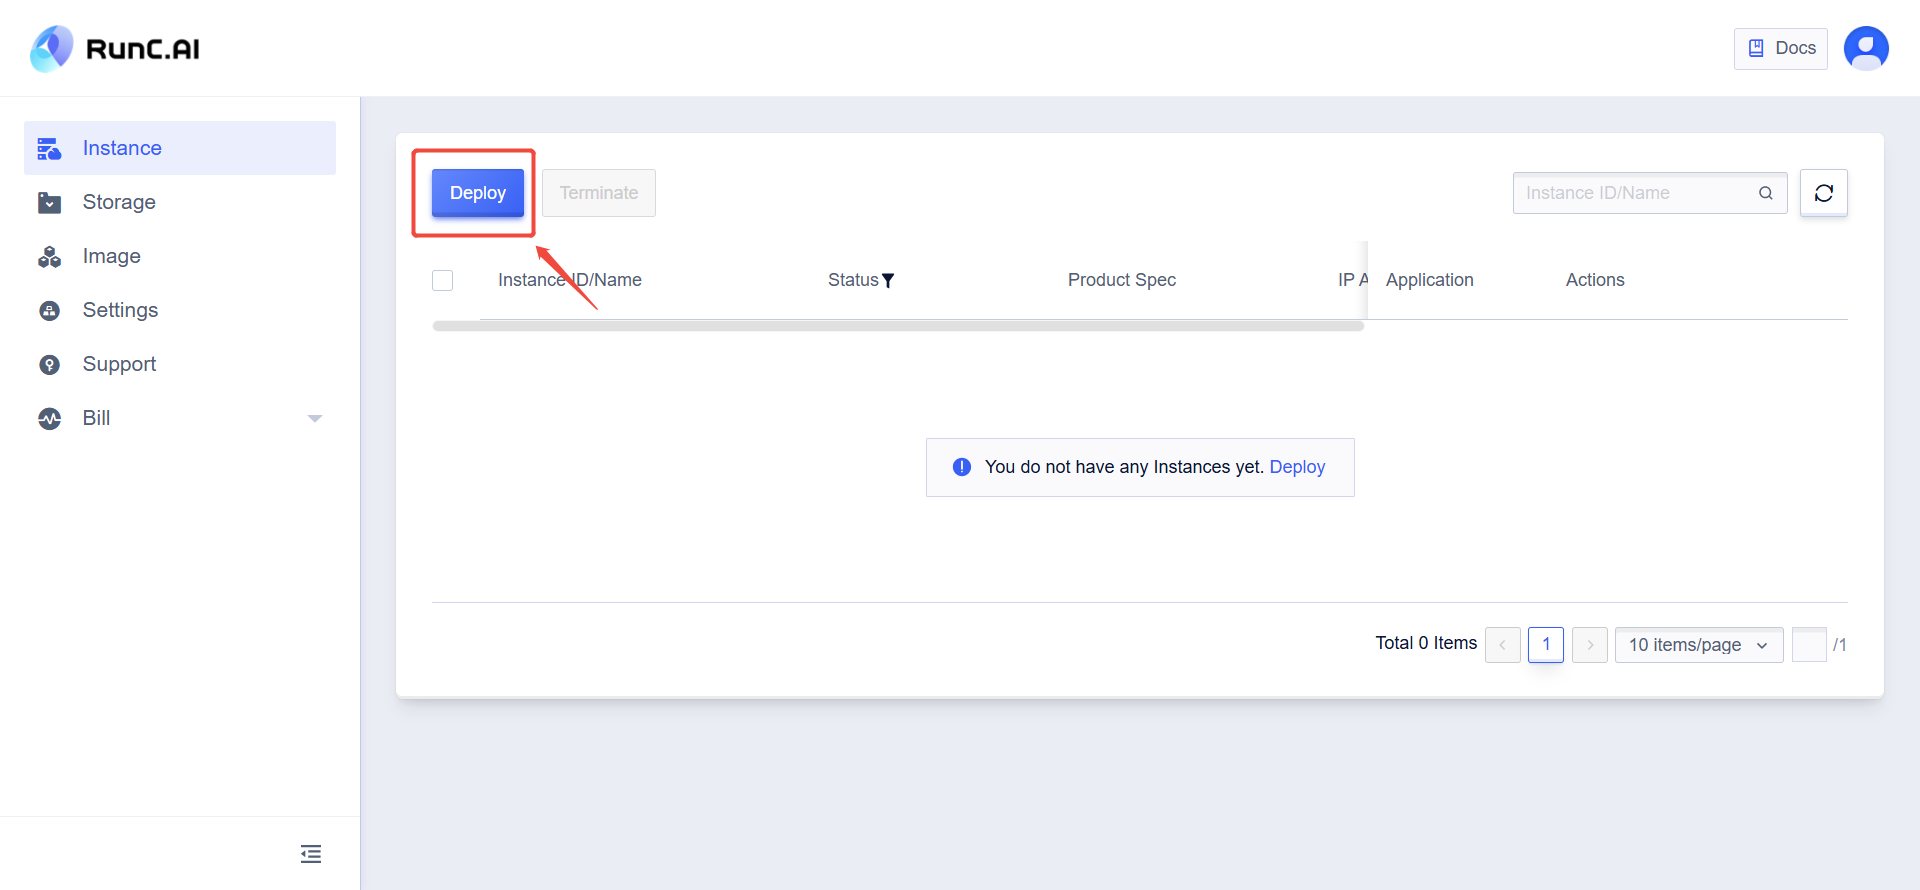
Secondly, enter the console. Go to "Instance" and click "Deploy" to start creating the image.
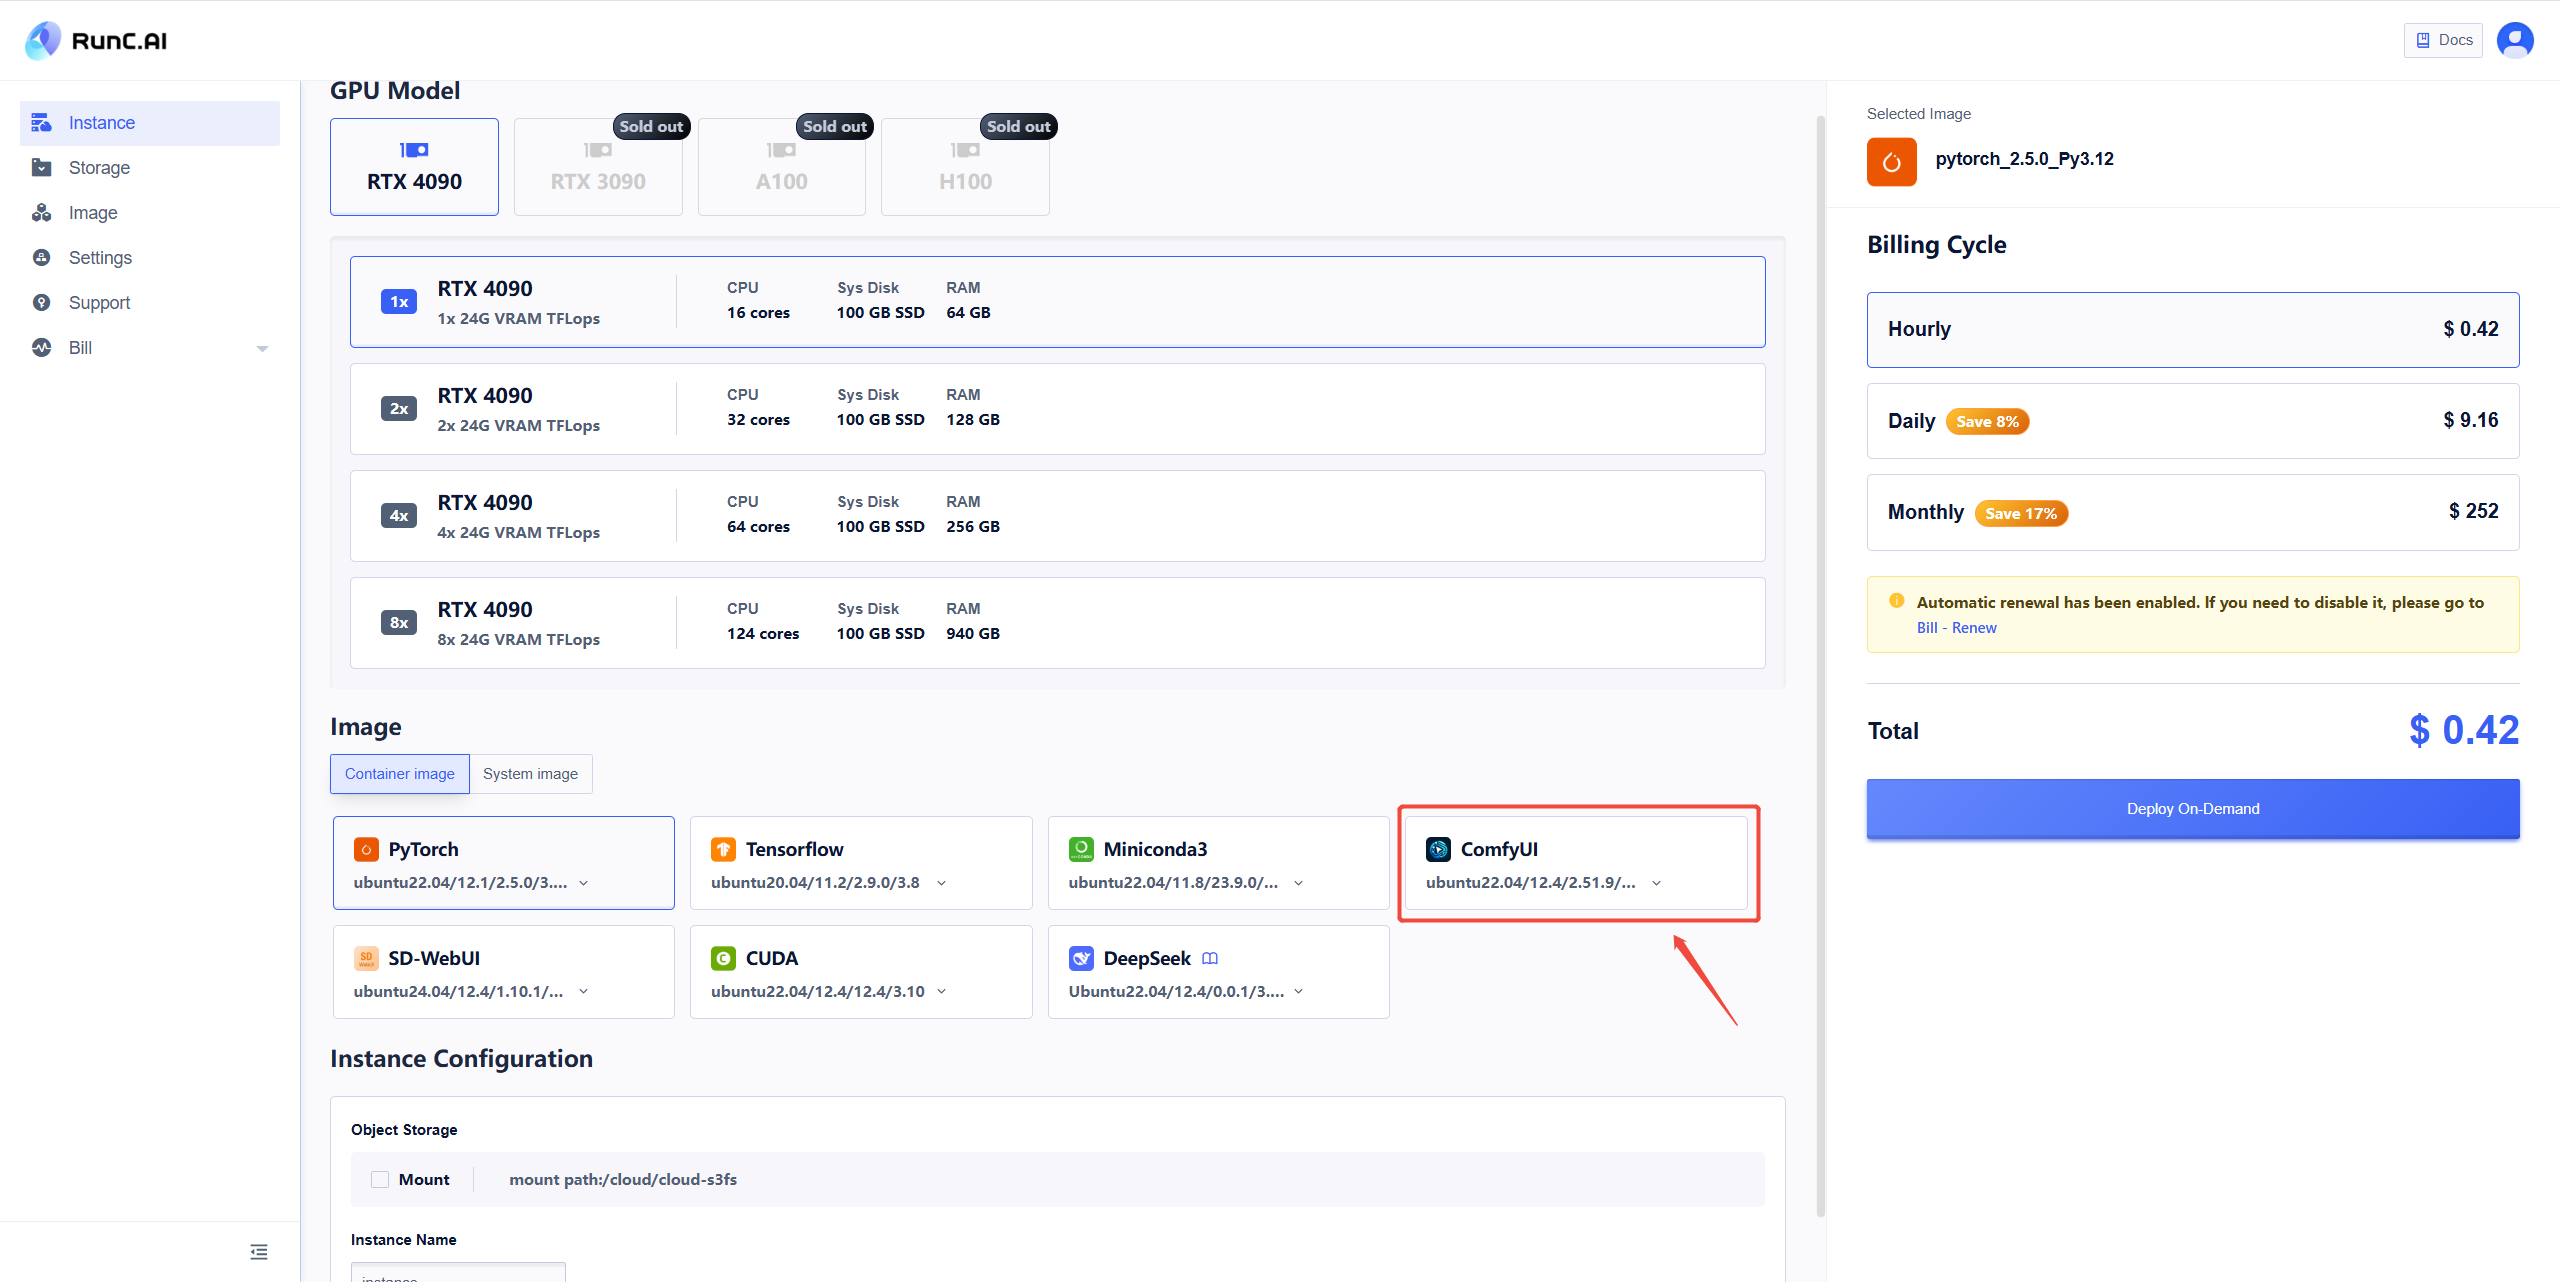
On this page, choose the GPU model and select the image you want to deploy or click system image to switch from different system.
Here I chose ComfyUI. Select billing cycle you want and deployment phase is done.
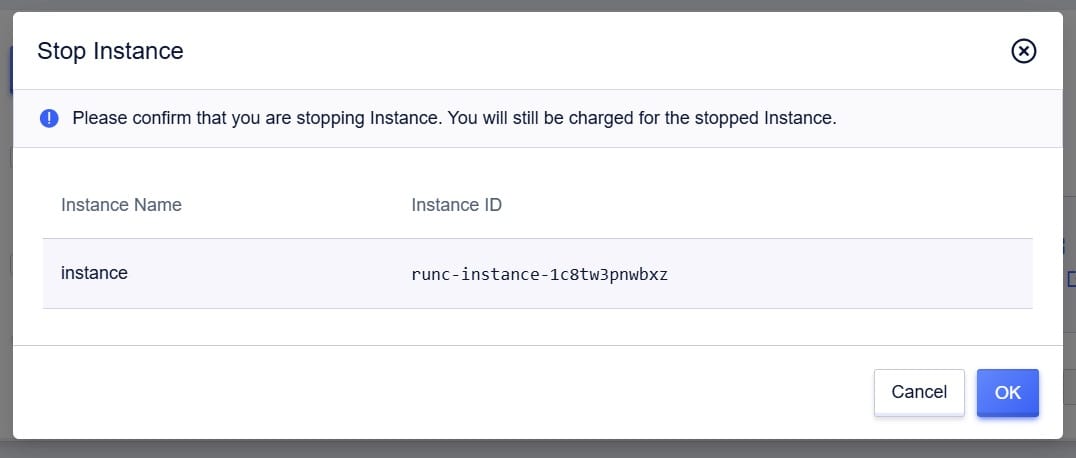
NOTE: You can see the status of your instance on the dashboard. If the status is 'running', even if you are not using it, the renting fee is still counting. Also, stopping the instance will still incur renting fees. If you would like to avoid fees, please delete the instance.
2. How to create a text-to-image workflow in the comfyUI
Next, I take you step by step to build the workflow of the text-to-image. You do not need to take notes to remember these functions when you first get started. The key here is to practice and master it through actual operation with deep understanding of each function.
First, if you are the first time initiating the ComfyUI interface, then there should be a default text-to-image workflow.
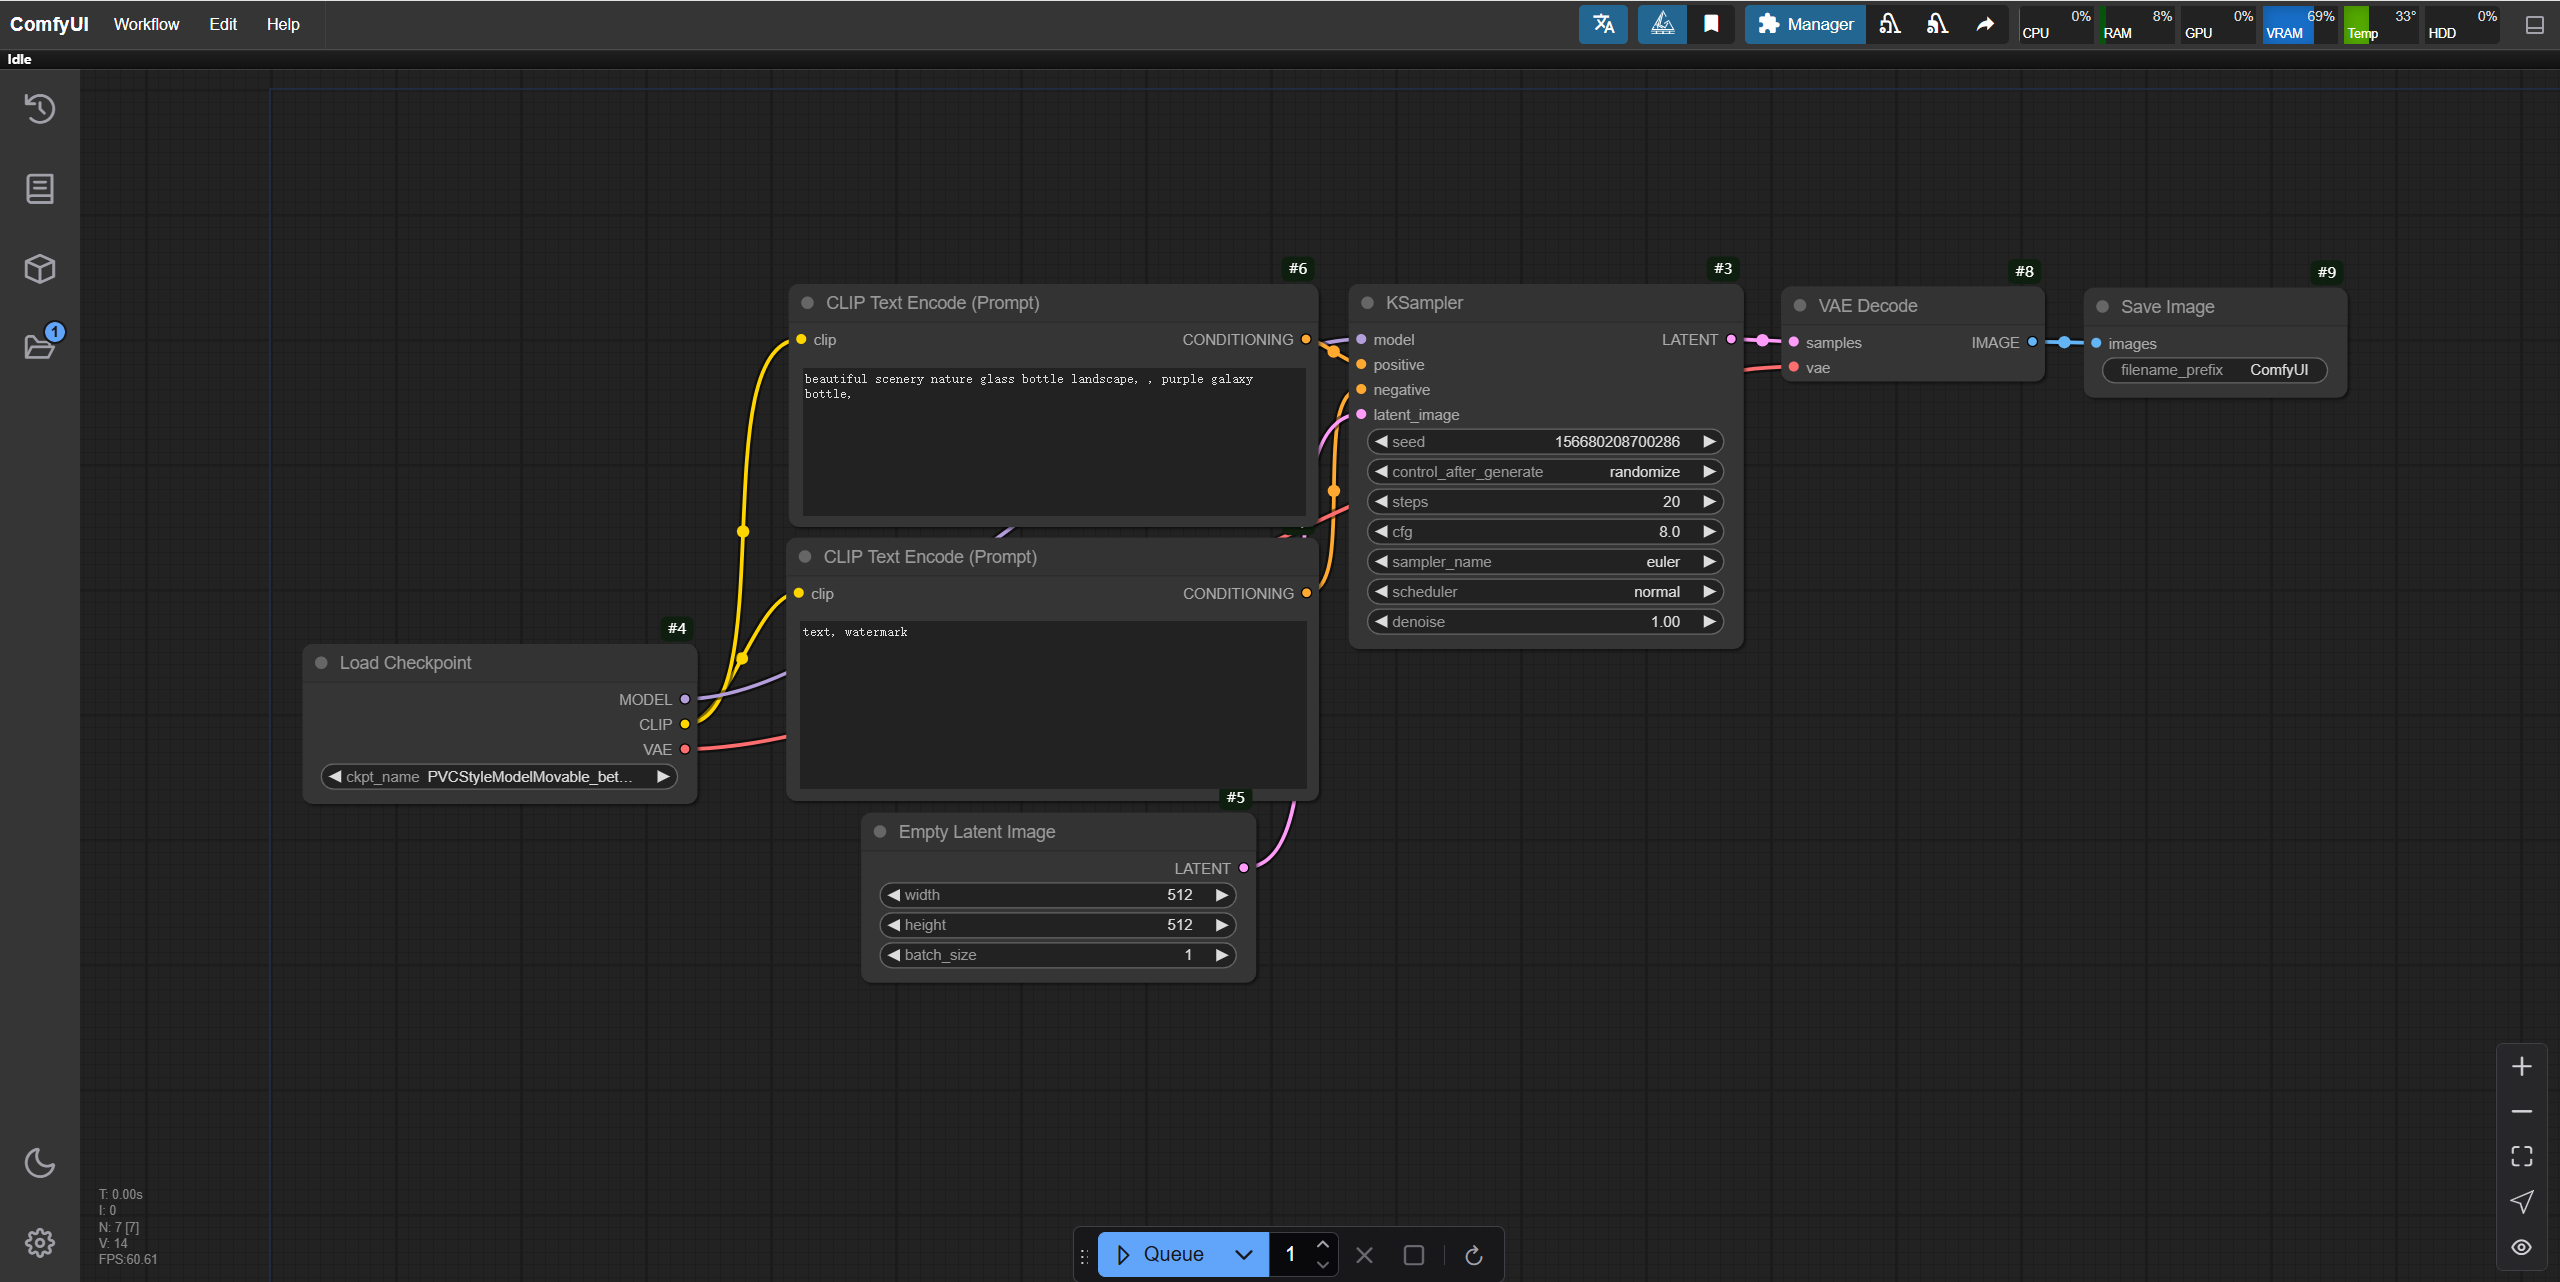
The next workflow we're going to build is this default text-to-image diagram, the purpose of which is to let you build the workflow yourself.
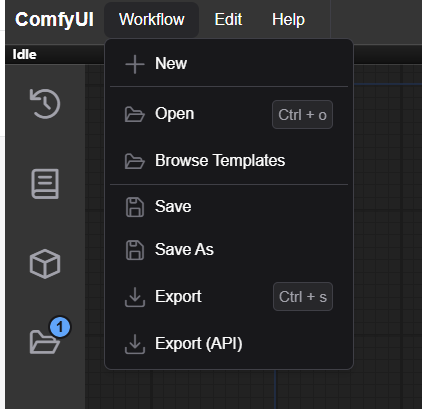
Then we click 'New' in the top left ribbon to create a new interface.
Step 1: Add "K Sampler"
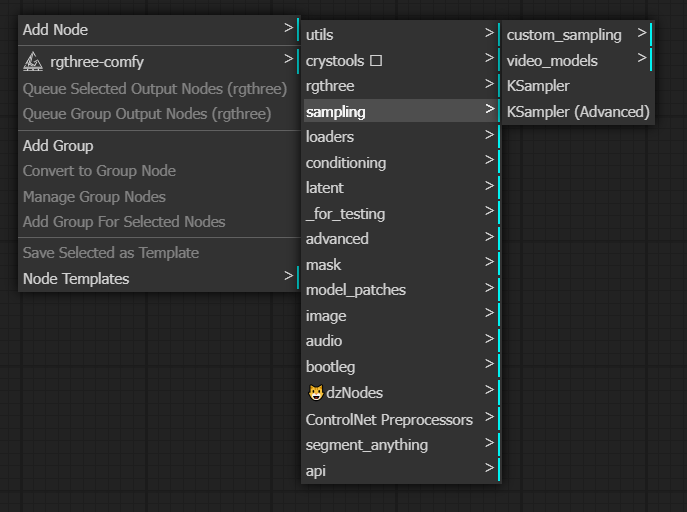
In the blank space of the workspace, single right mouse button to bring up the node ribbon, select Sampling - K Sampler, then we will add a sampler node in the workspace.
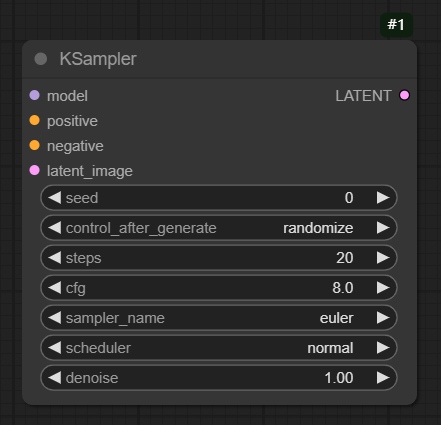
First, let's introduce a few parameter settings in the "K Sampler":
The first parameter "seed": corresponds to the seed value in the webUI, will display the value of the image every time it is generated, the default is 0.
The second parameter "control_after_generate": includes four options - fixed, increasing, decreasing, and random.
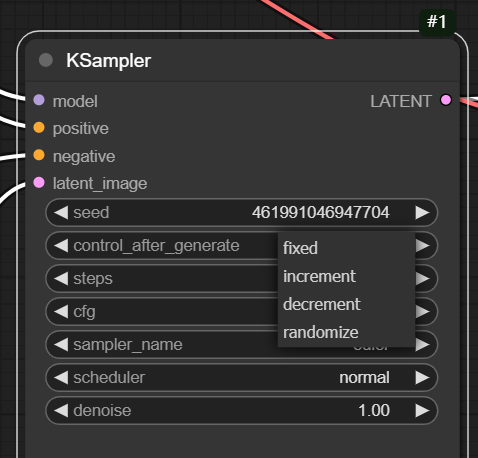
These two parameters are used together, "fixed" represents the value of the fixed image, and the increasing/decreasing is +1 or -1 value. "random" represents a random value. Generally we use fixed or random.
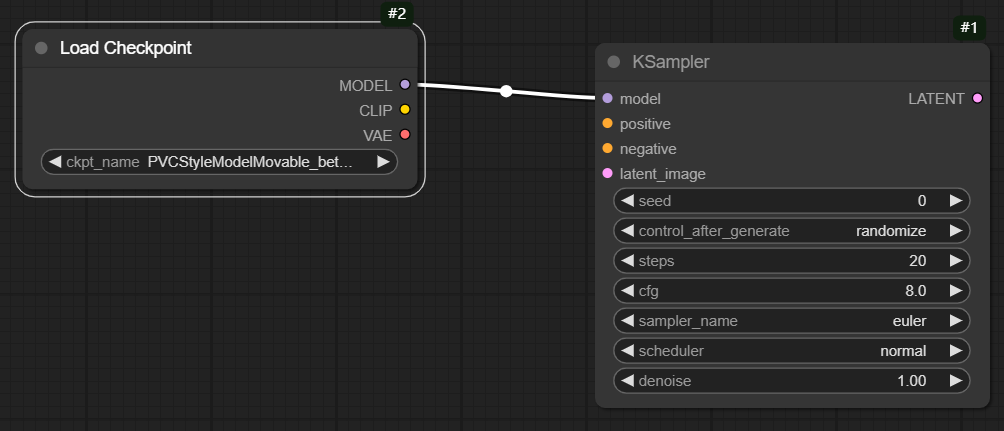
Step 2: Add "Large Models"
As shown in the figure, you can drag the model connection point and add the "Load Checkpoint".
Step 3: Add "Positive & Negative Prompt Words"
Add a positive prompt word input node in the same way as above, as shown in the figure:
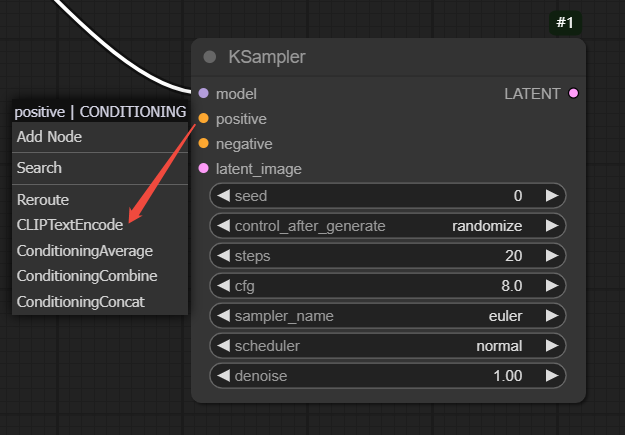
The negative CLIPTextEncode can be added in the same way, i.e. by dragging the 'negative' connection point.
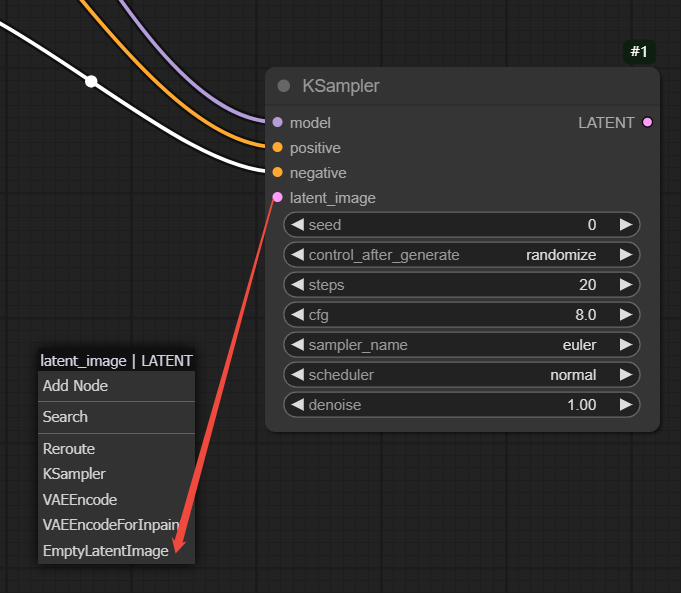
Step 4: Add "Image Size/Batch"
Drag the "latent_image" connection point and select "Empty Latent Image" to add the "Image Size/Batch" node, which has width, height and batch size parameters.
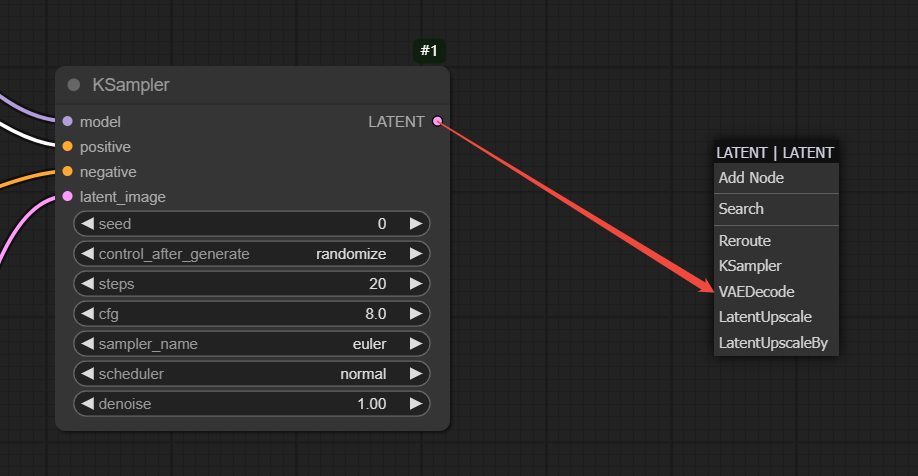
Step 5: Add "VAE Decoder"
Drag the "Latent" connection point and select "VAEDecode" to add VAE.
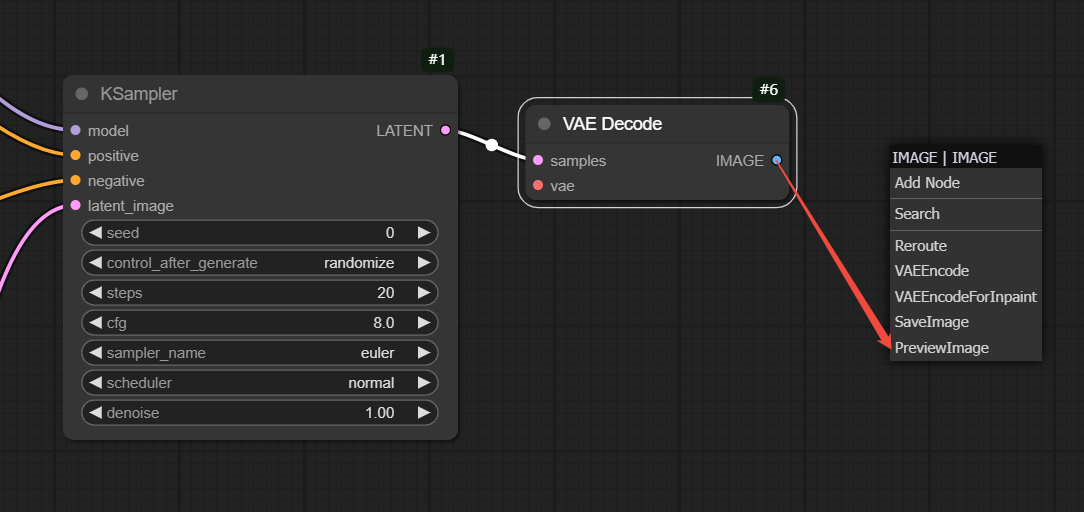
Step 6: Add "Image Generation Area"
Drag the "Image" connection point and select "Preview Image" to successfully add the image generation area.
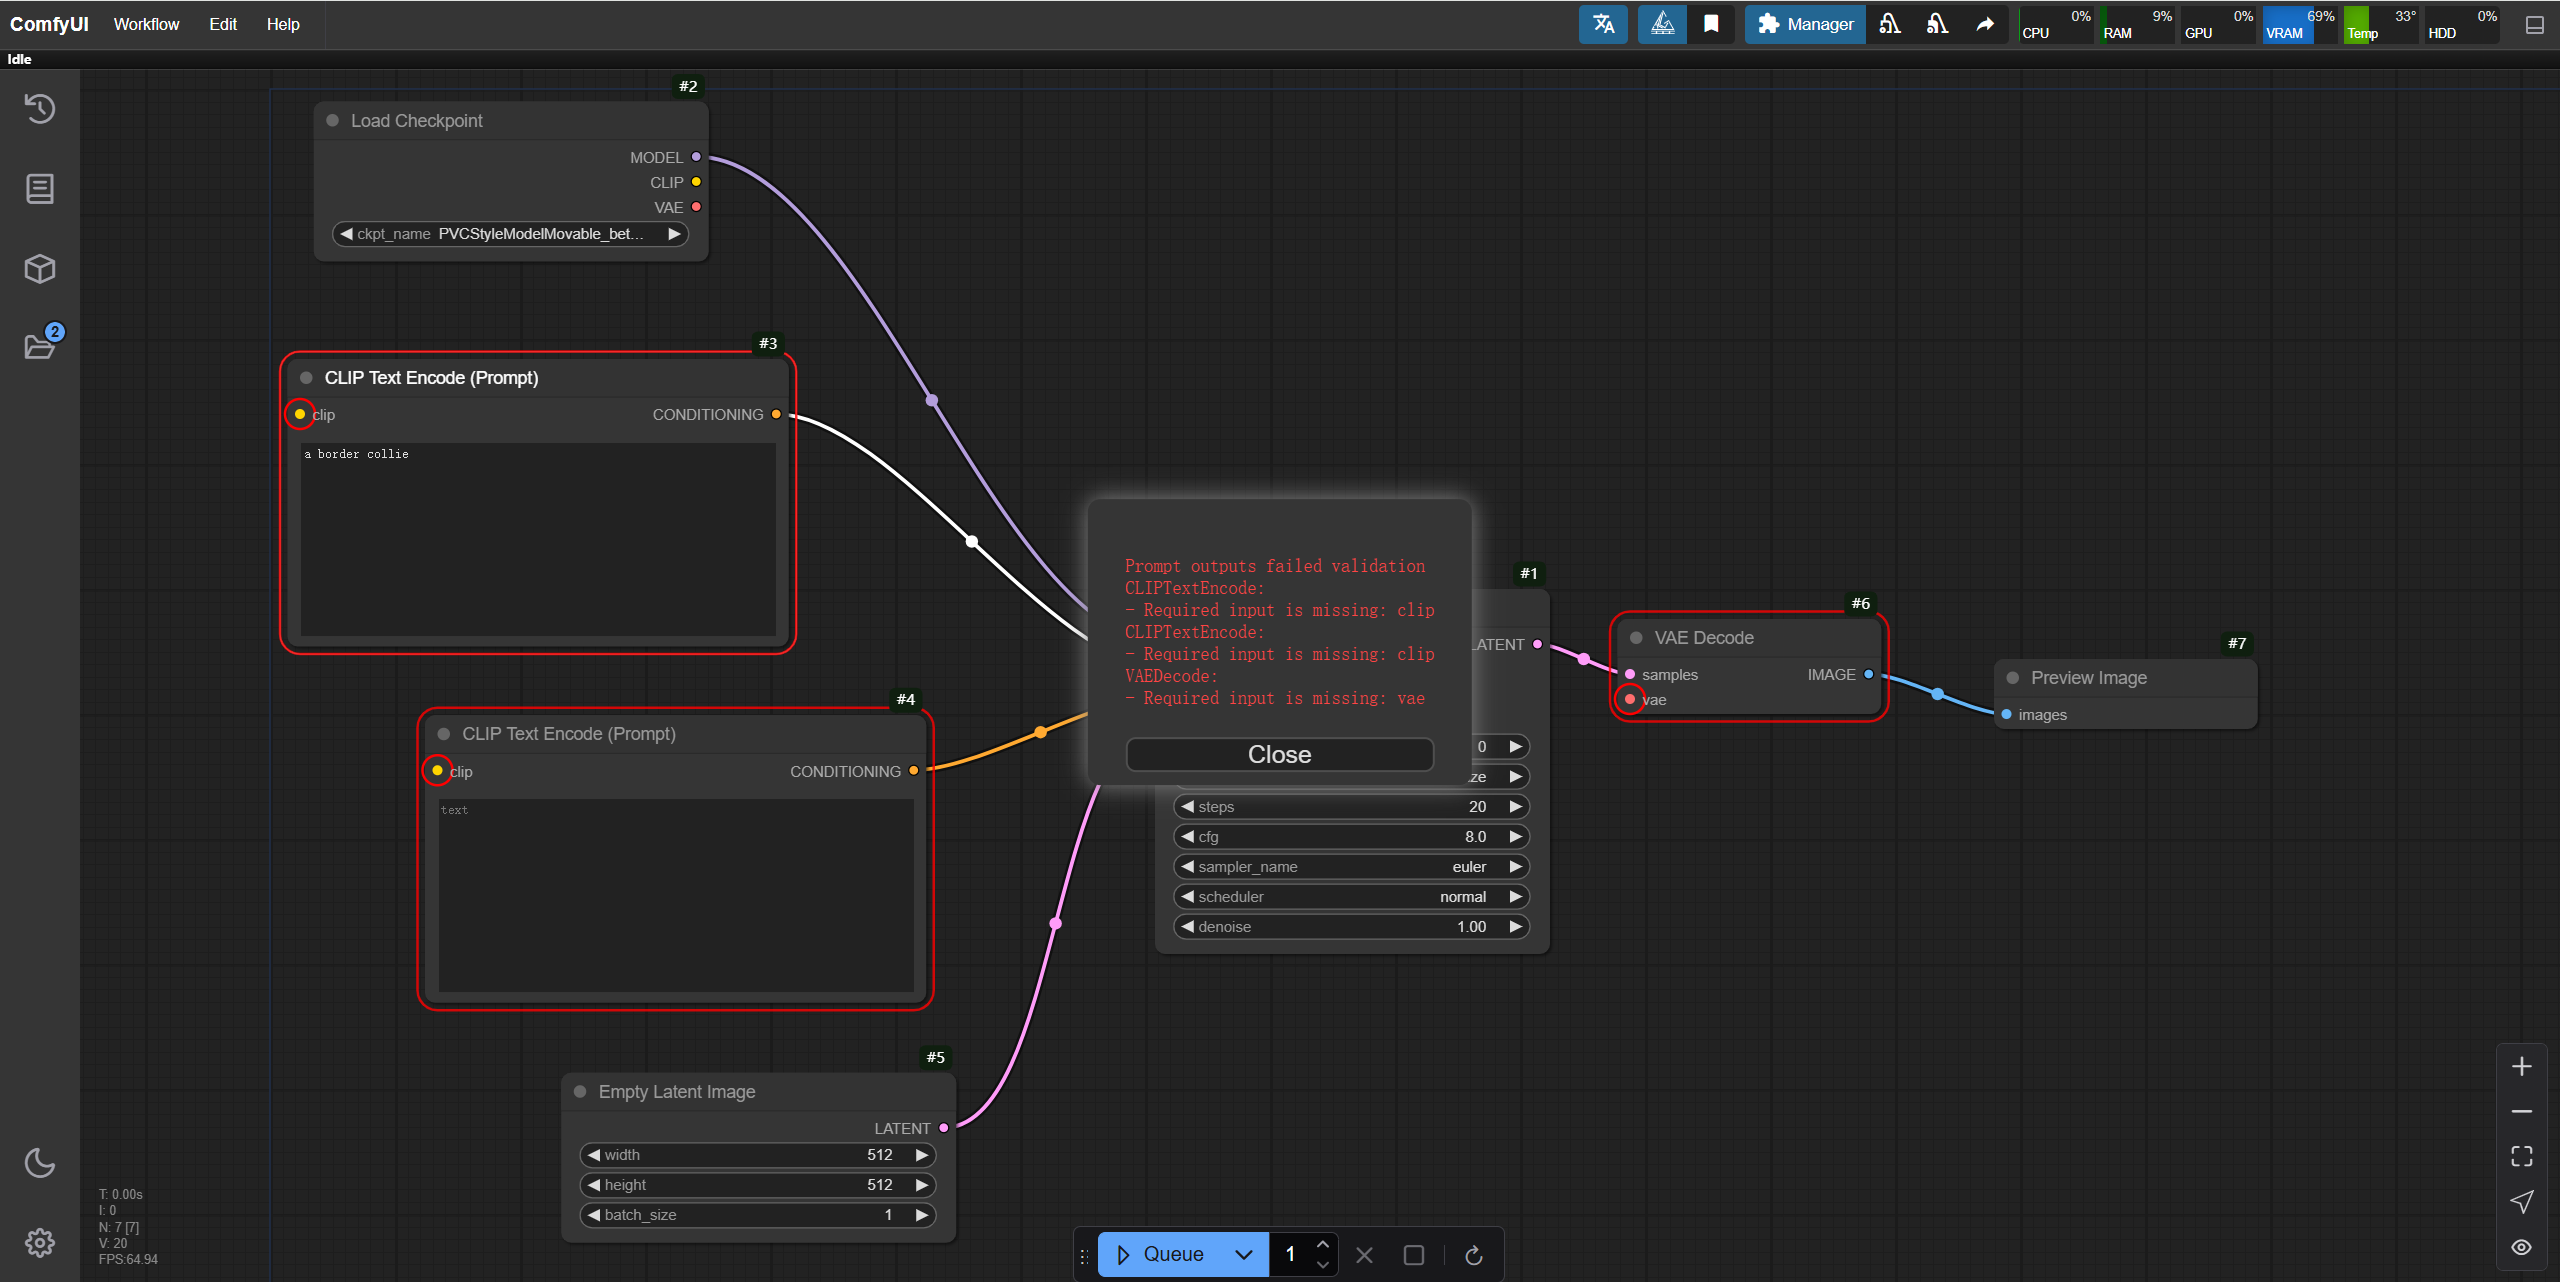
At this point, all the nodes needed for the entire text-generated graph have been successfully added, and we've entered a prompt in the forward prompts (e.g. a border collie).
If at this point you do what I did and click Queue, then you will get this error report, look at the red box in the figure for the prompt and the red markings on the nodes. The reason this is happening is because we have these red labeled nodes that are not connected.
Then next we need to fix these error nodes and connect them all together. Pay attention to the color on the connection point. If it is a yellow connection point you need to connect to the corresponding yellow connection point (name correspondence), as shown in the figure (I mark them with green arrows) :
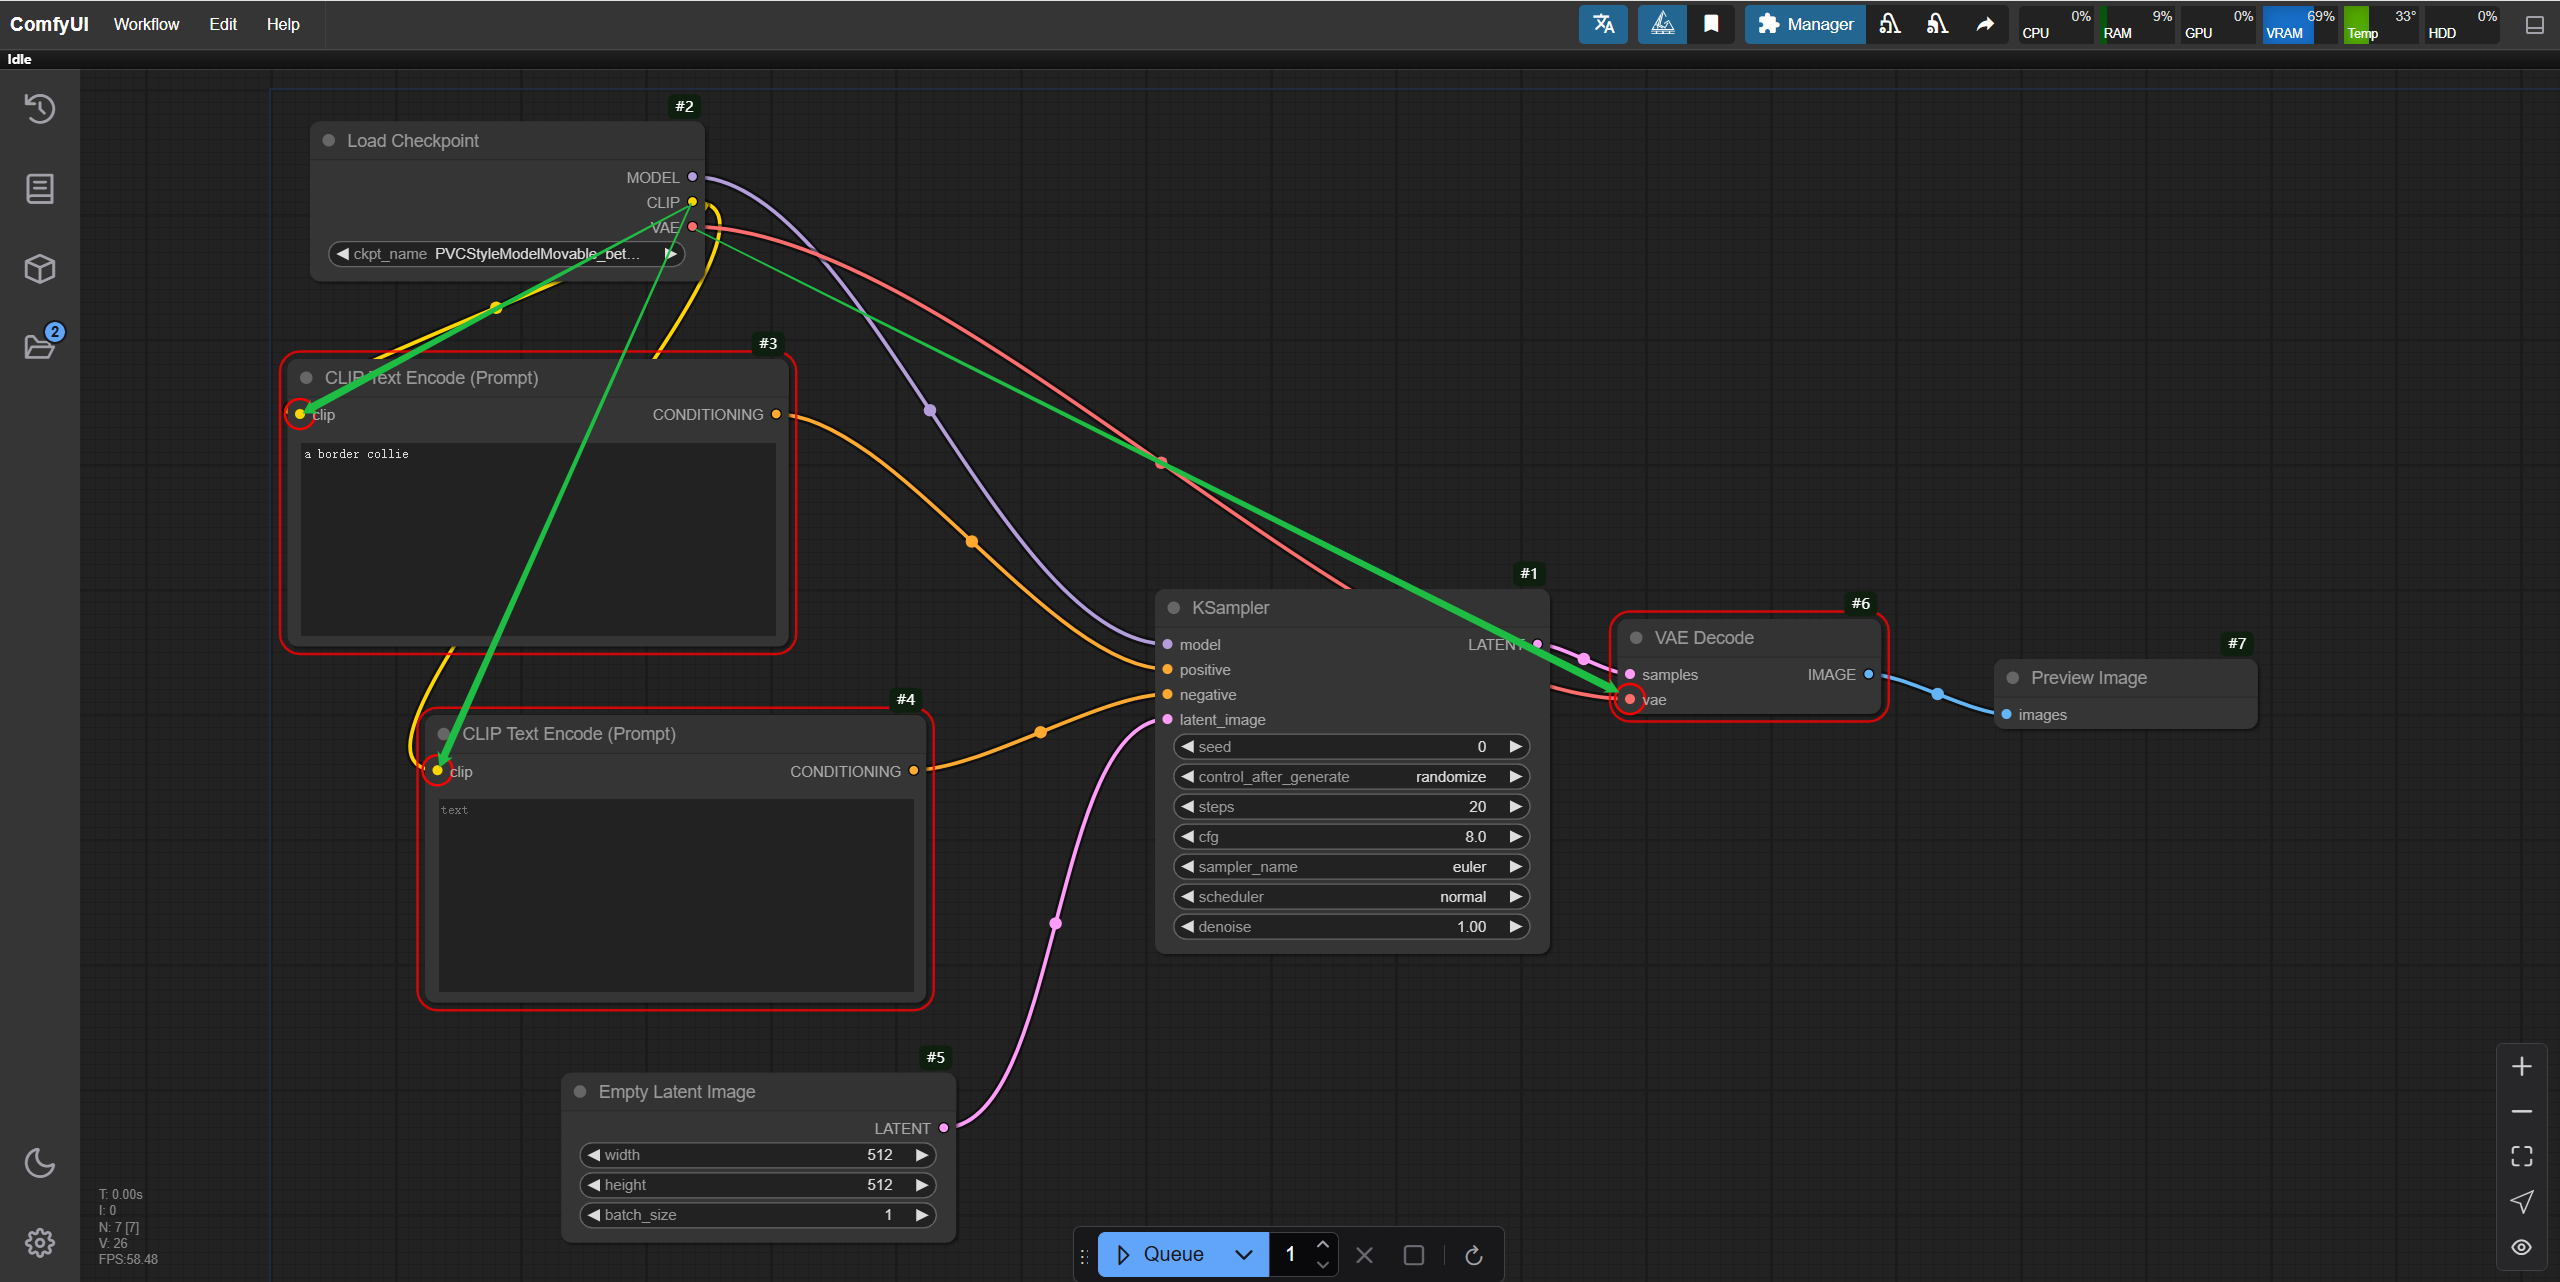
Then click "Generate" again. Congratulations! This text-to-image workflow has been successfully built.

Below to add a little more:
The image generation area selected above are preview images and needs to be manually saved. Right-click on the image, and select "Save Image" to download the image.
Comments
The whole process of building ComfyUI text-to-image workflow on RunC.AI platform is less than half an hour from registration to the completion of the workflow, which is very easy to understand and convenient. Unlike the complexity and high cost of local deployment, RunC.AI solves these problems perfectly.
RunC.AI's interface is simple and intuitive so even first-time AI users can get started easily. When generating images, the response speed is very fast with almost no lag. And there were no failures or errors reported during the entire process.
Whether you are a novice or an experienced user, you can find the right tools and resources for you on RunC.AI. In the future, I'll post more features and try to build different types of workflows. Stay tuned!
About RunC.AI
Rent smart, run fast. RunC.AI allows users to gain access to a wide selection of scalable, high-performance GPU instances and clusters at competitive prices compared to major cloud providers like Amazon Web Services (AWS), Google Cloud, and Microsoft Azure.