
Text-to-video generation is the frontier of AI generator creativity. With WAN 2.1—a powerful AI video synthesis model—and ComfyUI's flexible, node-based visual programming interface, creators can now bring written prompts to life as dynamic, coherent videos with AI. However, running such advanced models requires significant GPU resources. This is where RunC.AI, a cloud GPU provider, enters the scene. This blog offers a step-by-step guide to generating free AI content using WAN 2.1 on ComfyUI, powered by RunC.AI.
You must have heard of how Kling, ChatGPT, and leonardo.ai can create images with simple prompts. As AI generator continues to advance, one of the most exciting developments is text-to-video synthesis—the ability to generate realistic, animated videos directly from written prompts. WAN 2.1 (short for "World Animation Network") is one of the leading text-to-video models, known for its high-quality, stylized outputs. Running it effectively requires a strong backend—and that’s where ComfyUI, a free AI image and AI video generator, and RunC.AI come in. ComfyUI provides a modular, visual interface for working with AI models, while RunC.AI supplies the cloud-based GPU horsepower necessary for smooth rendering. This guide will walk you through how to use WAN 2.1 on ComfyUI with RunC.AI for seamless, high-performance text-to-video generation.
What You Need for Such a Task:
Before diving in, make sure you have the following:
● A RunC.AI account with access to cloud GPU instances.
● A basic understanding of ComfyUI (no coding required, but helpful).
● Familiarity with the WAN 2.1 model (we’ll cover how to install it).
● A modern web browser and internet connection.
● An excellent idea in your mind!
Step 1: Enter ComfyUI through RunC.AI instance
Sign up or log in to RunC.AI and click on the "Deploy” tab to start an instance. Select a ComfyUI template (other options include Python, CUDA). When the instance is running, it starts to charge; after your creation is done, you can terminate the instance to avoid extra charges.

Enter RunC.AI page and click "Deploy"
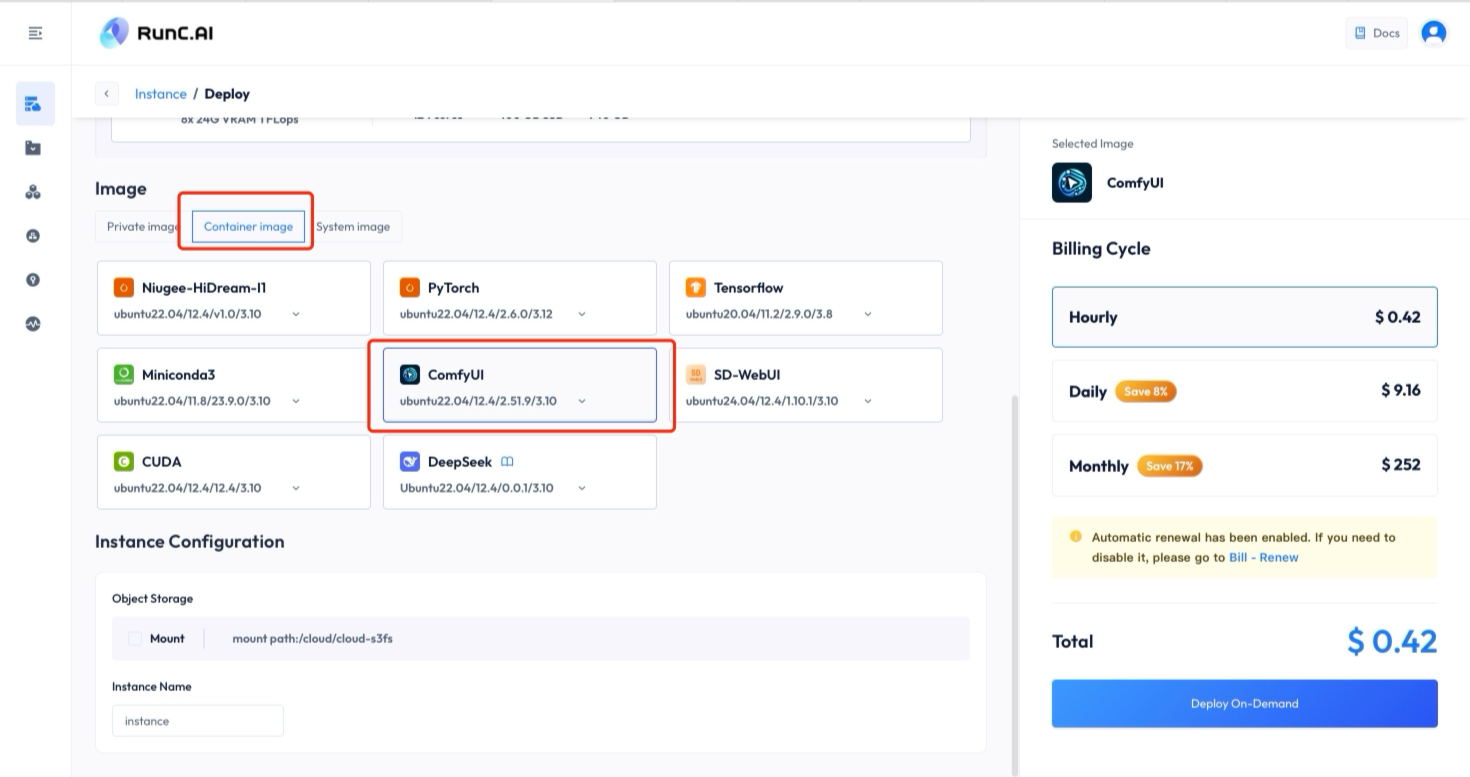
Create Container image-ComfyUI template
Step 2: Install WAN 2.1 in ComfyUI
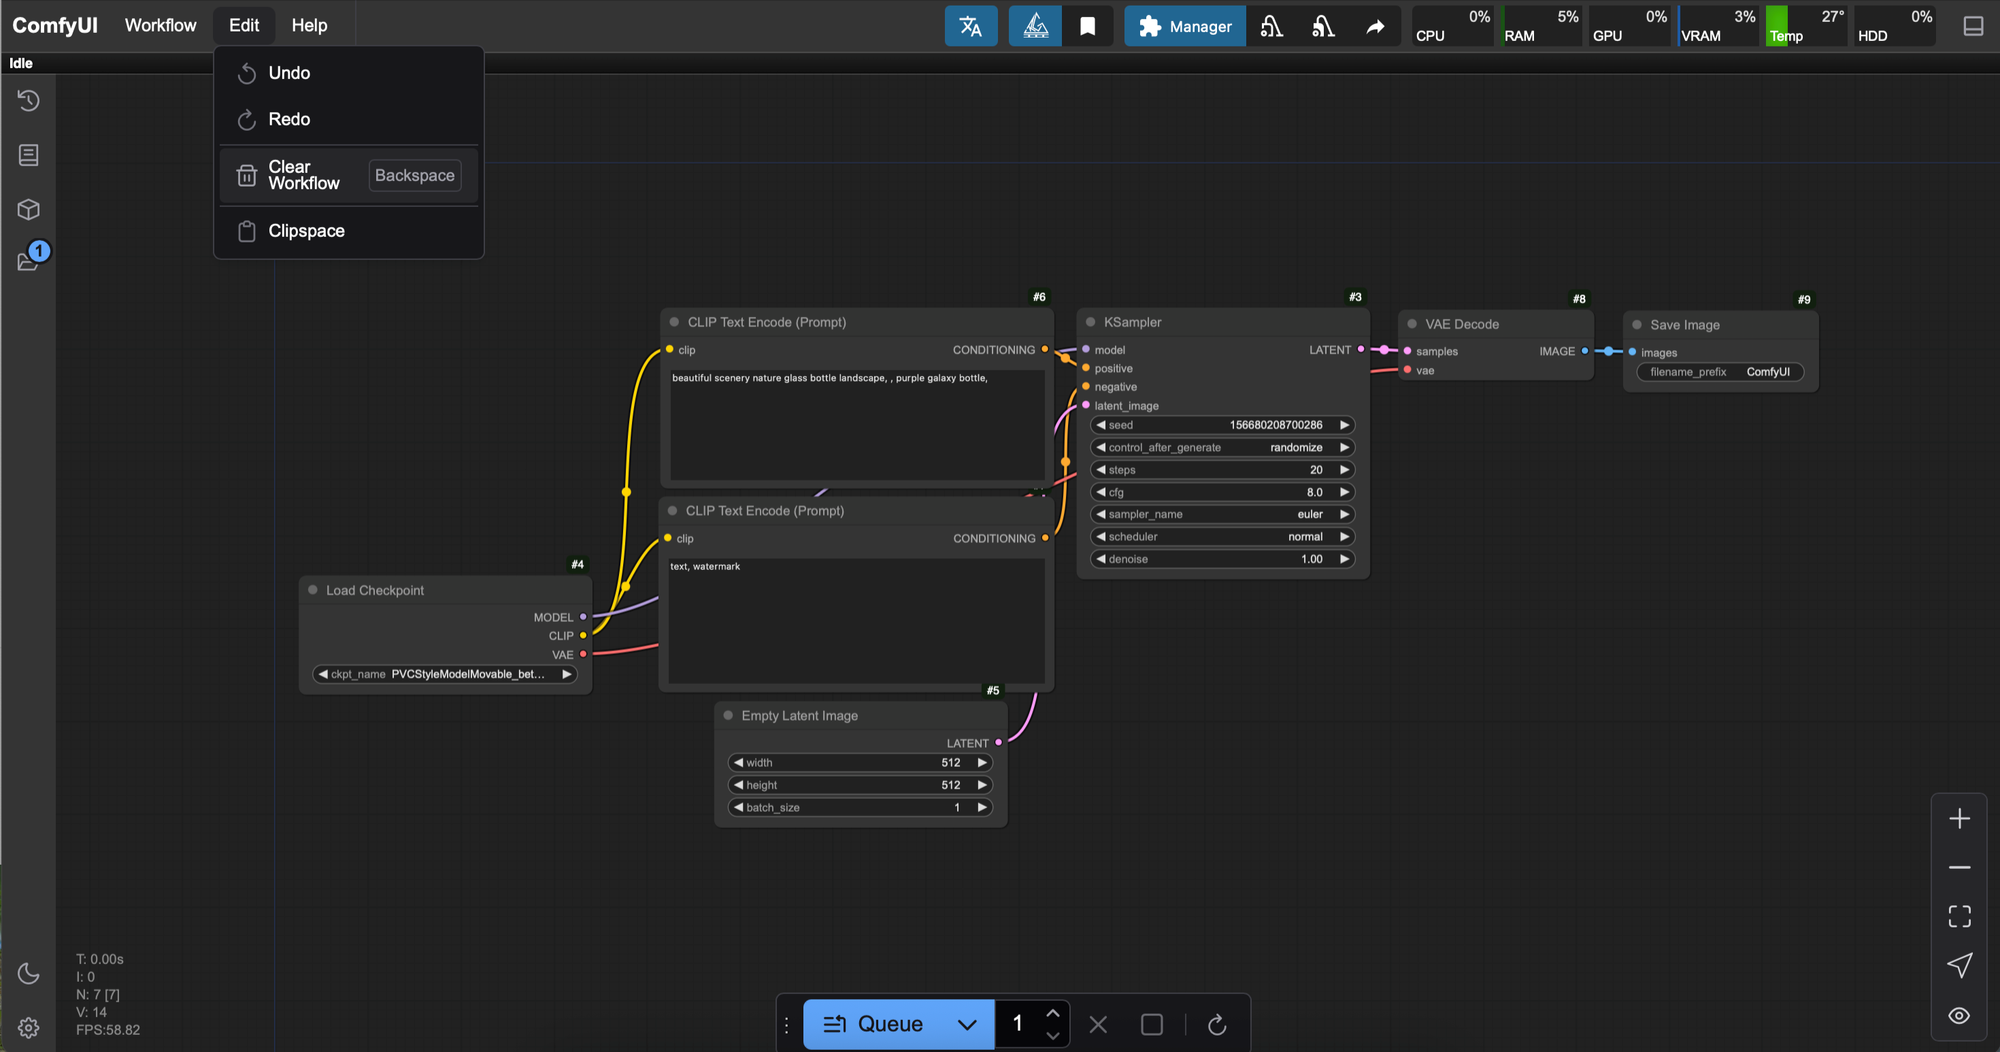
Once your instance is running, click “ComfyUI” to enter ComfyUI; there will be an example workflow. Clear the example to create a new workflow for our use.
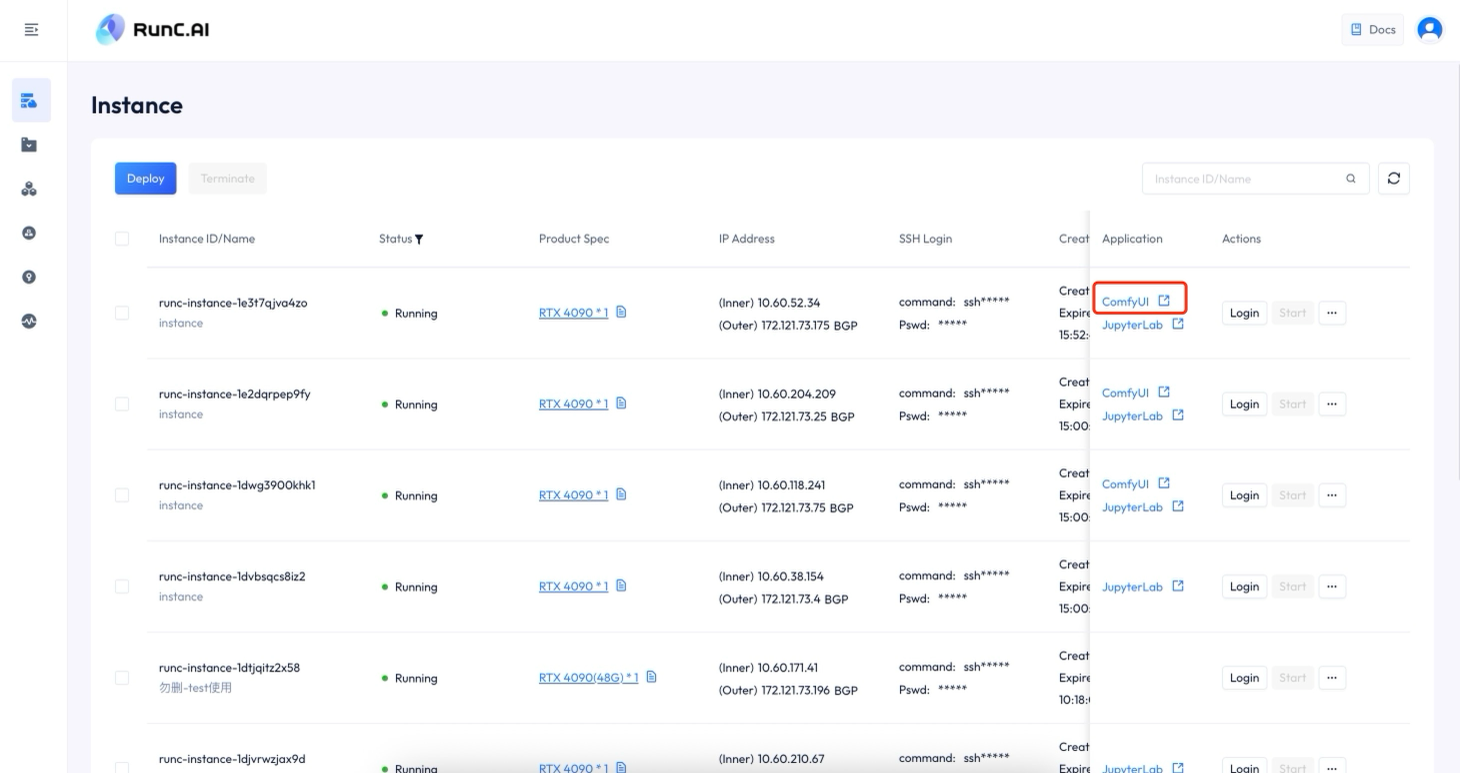
Enter ComfyUI application
There are already many models on ComfyUI. But to make a “text-to-video” task, we need to install several additional models, including:
Diffusion model:
wan2.1_t2v_14B_bf16.safetensors,
wan2.1_t2v_14B_fp16.safetensors,
wan2.1_t2v_14B_fp8_e4m3fn.safetensors,
wan2.1_t2v_14B_fp8_scaled.safetensors,
wan2.1_t2v_1.3B_bf16.safetensors,
wan2.1_t2v_1.3B_fp16.safetensors;
VAE: wan_2.1_vae.safetensors;
Text encoders:
umt5_xxl_fp8_e4m3fn_scaled.safetensors;
For different diffusion models, the quality of videos generated is ranked from highest to lowest as:
fp16>bf16>fp8_scaled>fp8_e4m3fn; 14B>1.3B.
Three ways to install:
First method, install from “Manager”-"Model Manager"; enter and install these models:
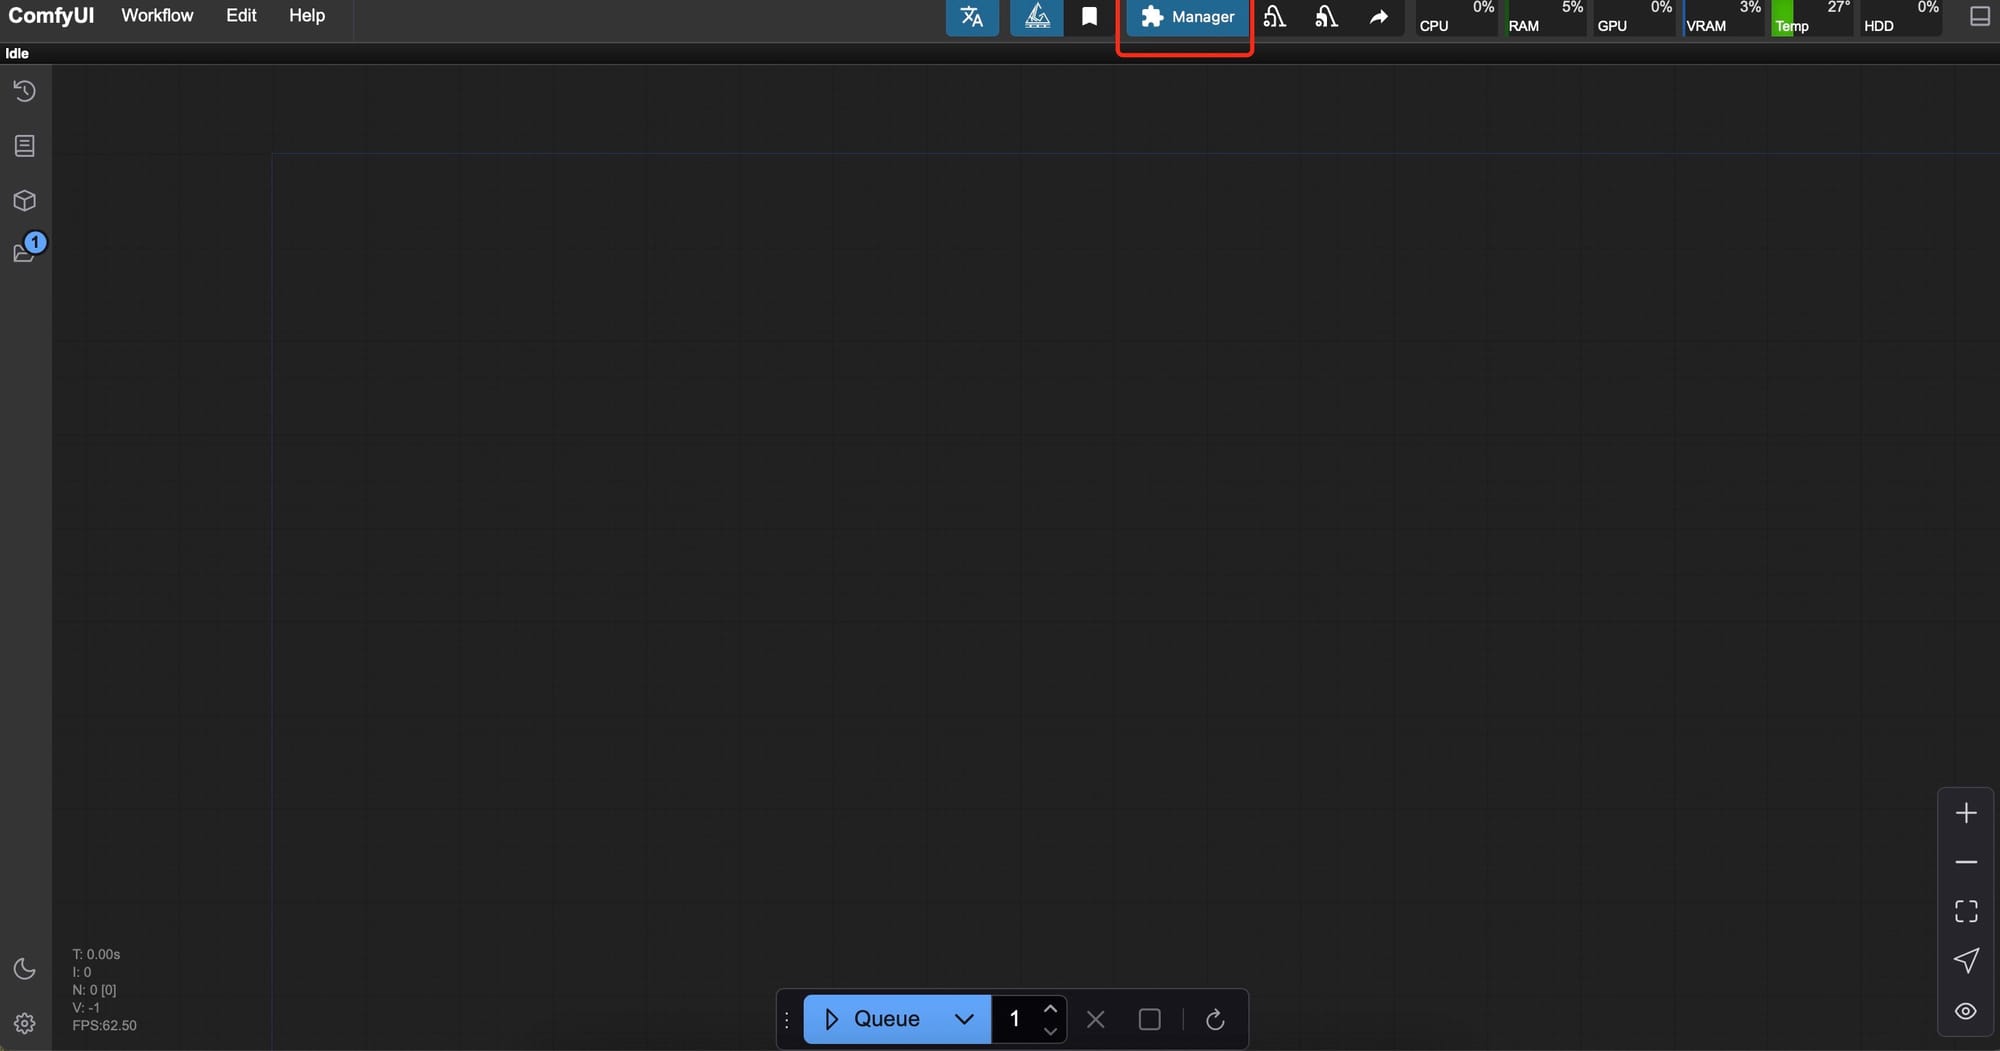
Click "Manager" at the top
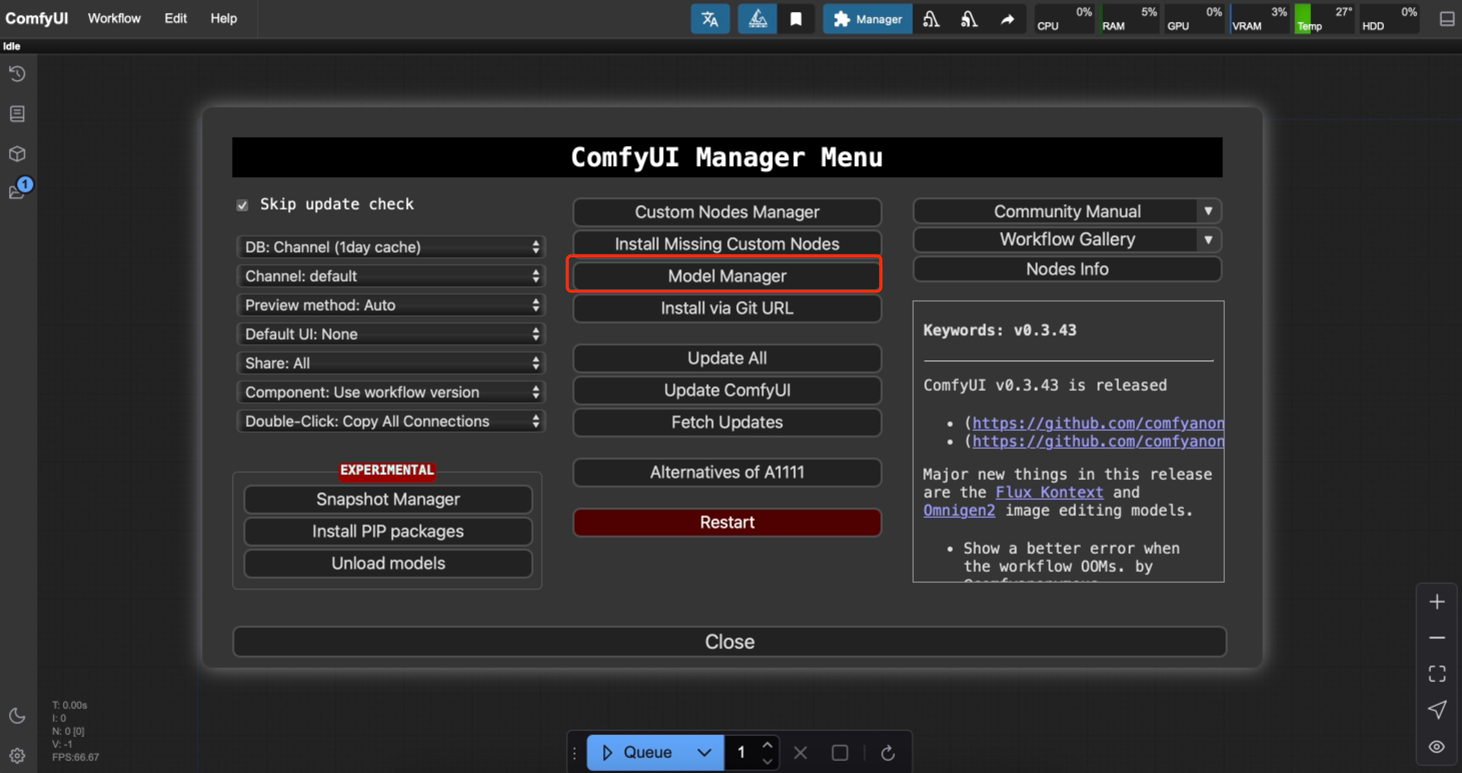
Click "Model Manager" button
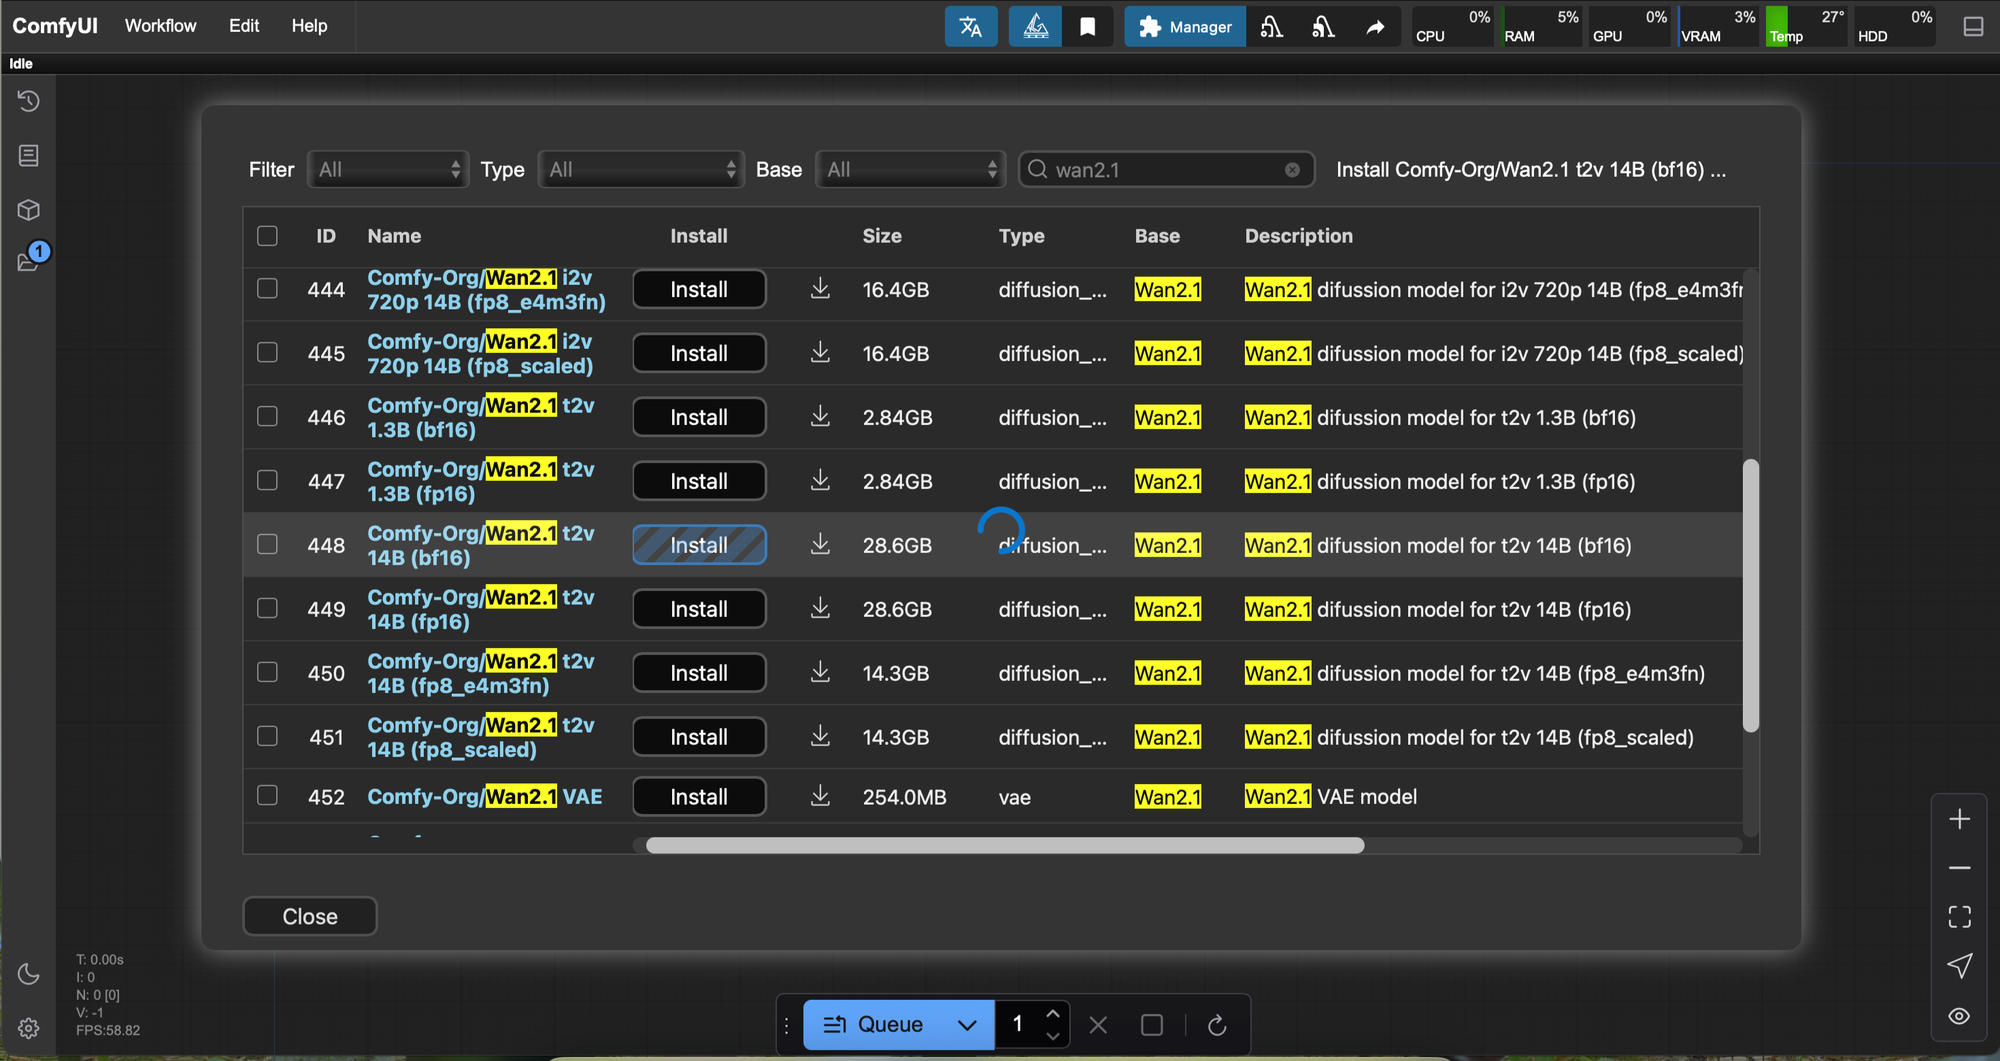
Click "install" for the right models
Secondly, install via Git URL: GitHub - kijai/ComfyUI-WanVideoWrapper

install via Git URL
Thirdly, download the models locally to your computer, open JupyterLab (File Browser/root/ComfyUI), and add them to the right ComfyUI files/categories respectively.
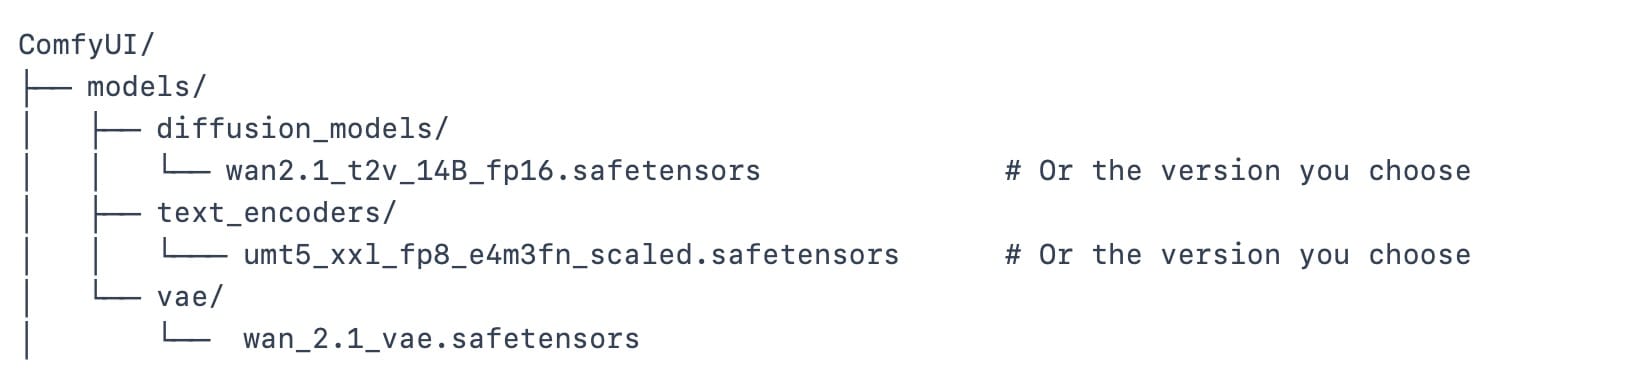
Add models to comfyui files
Remember to “Refresh” or "Restart" ComfyUI after installing new models. Installing these models might take some time, but it’s all worth it!
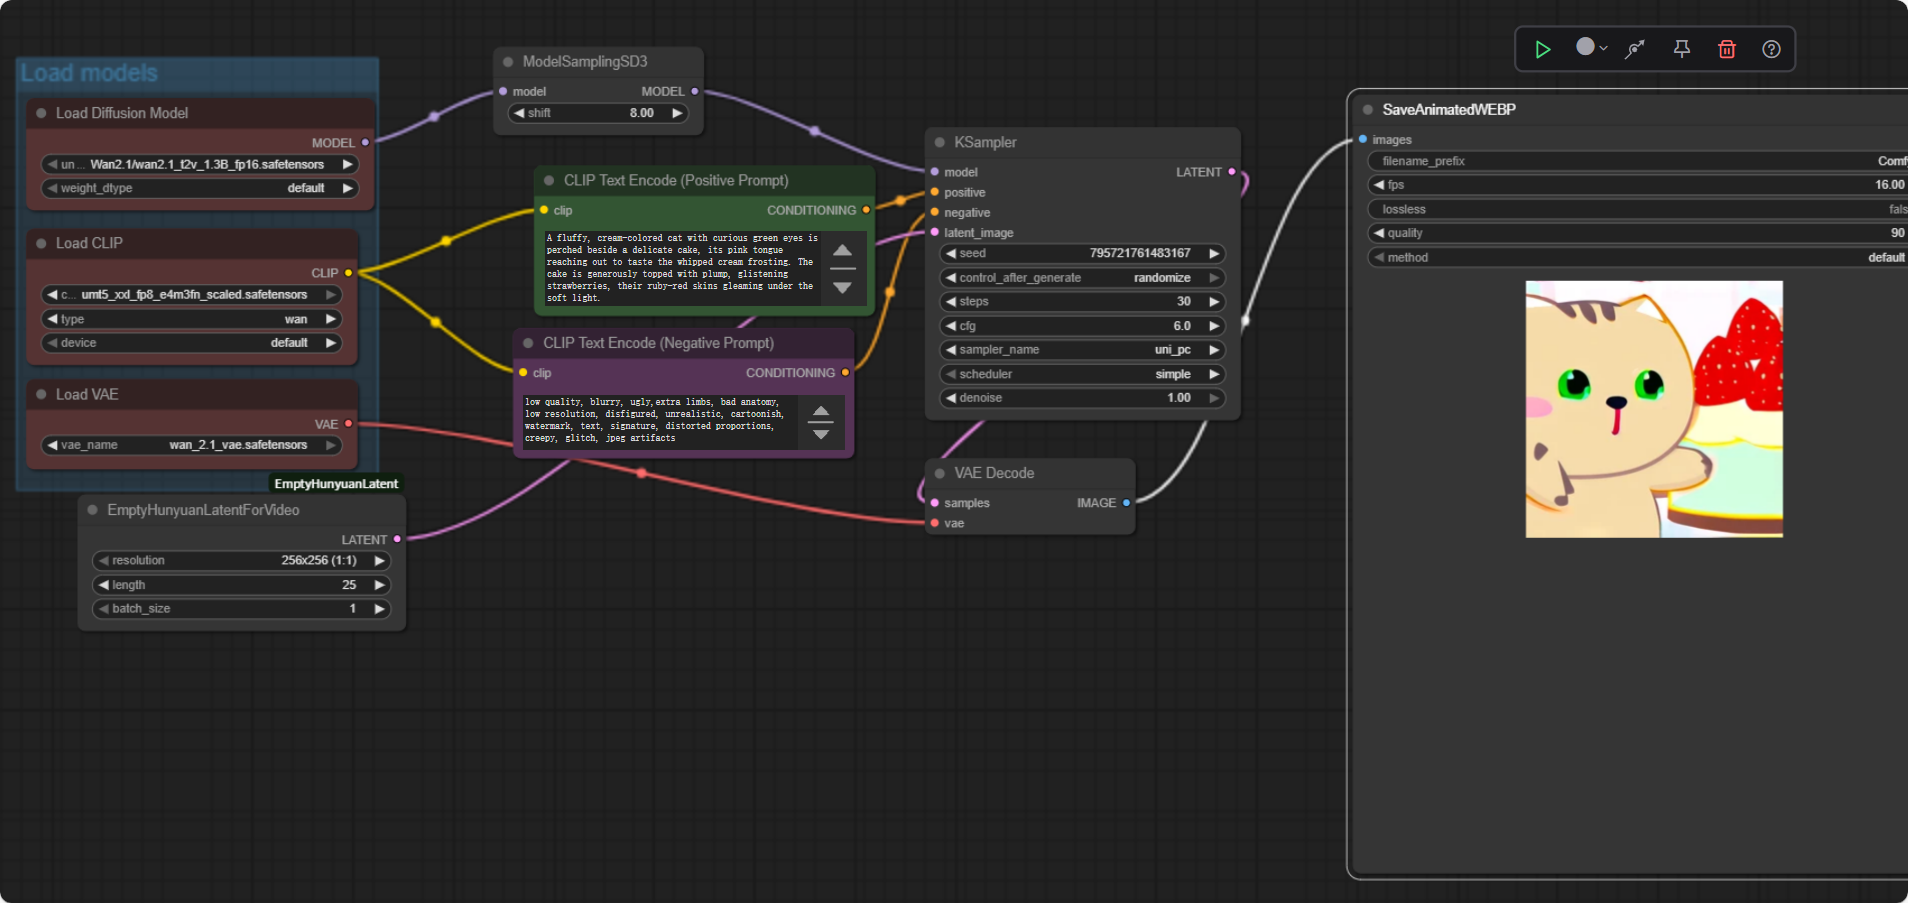
Step 3: Create a Text-to-Video Workflow
Now, let’s bring WAN 2.1 into your workflow:
You can create the workflow according to this frame, or simply download wan2.1_t2v.json and open it in ComfyUI.
If an error pops up, please install the missing nodes in “Manager” settings. Make sure all the nodes are connected correctly, and click “run” to generate the video and turn your text into video! If you are not satisfied with the results, you can try several times to get different results. For higher-quality videos, fp16 diffusion model will bring better results.
Step 4: Export and Share Your Videos
Once your video is generated, you can download it directly from the ComfyUI interface or the RunC.AI terminal. Then you can upload to YouTube or other social platforms to share your outputs, or use them in your projects.
Text-to-video AI is no longer a distant dream. With the power of WAN 2.1, the intuitive interface of ComfyUI, and the scalable compute from RunC.AI, anyone can generate compelling, high-quality AI videos from simple prompts. Whether you're creating for fun, film, or future applications like virtual production, this setup empowers creativity at scale. While the ecosystem is still evolving, WAN 2.1 and ComfyUI offer a robust foundation for experimenting with AI-generated motion content. And with cloud GPU support, you’re no longer limited by your local hardware.
If you’d like help automating your workflow or accessing pre-built templates, let me know in the comments or reach out!